
A tall wall-hung basin is one of those pieces that either works beautifully or looks wrong the day it goes on the wall. The difference is rarely the basin itself — it is whether the Wall Hung Ceramic Basin 1050WC, Luxury Gold Line Wall Mount Sink was planned into the wall before the wall was closed up. This article sets out what a complete installation plan for this model should contain, from substrate and reinforcement to rough-in, faucet selection, matching pieces and site handover.
What the 1050WC actually is, and why that changes the plan
The 1050WC is a tall, slim wall-mounted washbasin in vitreous ceramic with a gold line accent. Its published size is 410 × 340 × 620 mm, and it carries on the wall through a back panel rather than a vanity unit or a pedestal. The vertical silhouette is the whole point: it reads as a feature piece in a boutique hotel restroom, a villa powder room or a guest bathroom where you want one strong object rather than a run of cabinetry.
That form has three practical consequences for anyone writing a specification or an installation programme:
- The load path is the wall. There is no floor support. The back panel needs solid, continuous fixing to a substrate that can take a loaded ceramic basin plus the leverage of someone leaning on it.
- Nothing can be hidden later. Waste, overflow connection, supply lines and the faucet rough-in all sit behind the wall. Once tiles are on, changes mean breaking out finishes.
- The height is a design decision, not a default. A 620 mm tall body fixed to a standard rim height can put the basin too low or too high for the room. Rim height must be set against the finished floor level and the users of the space.
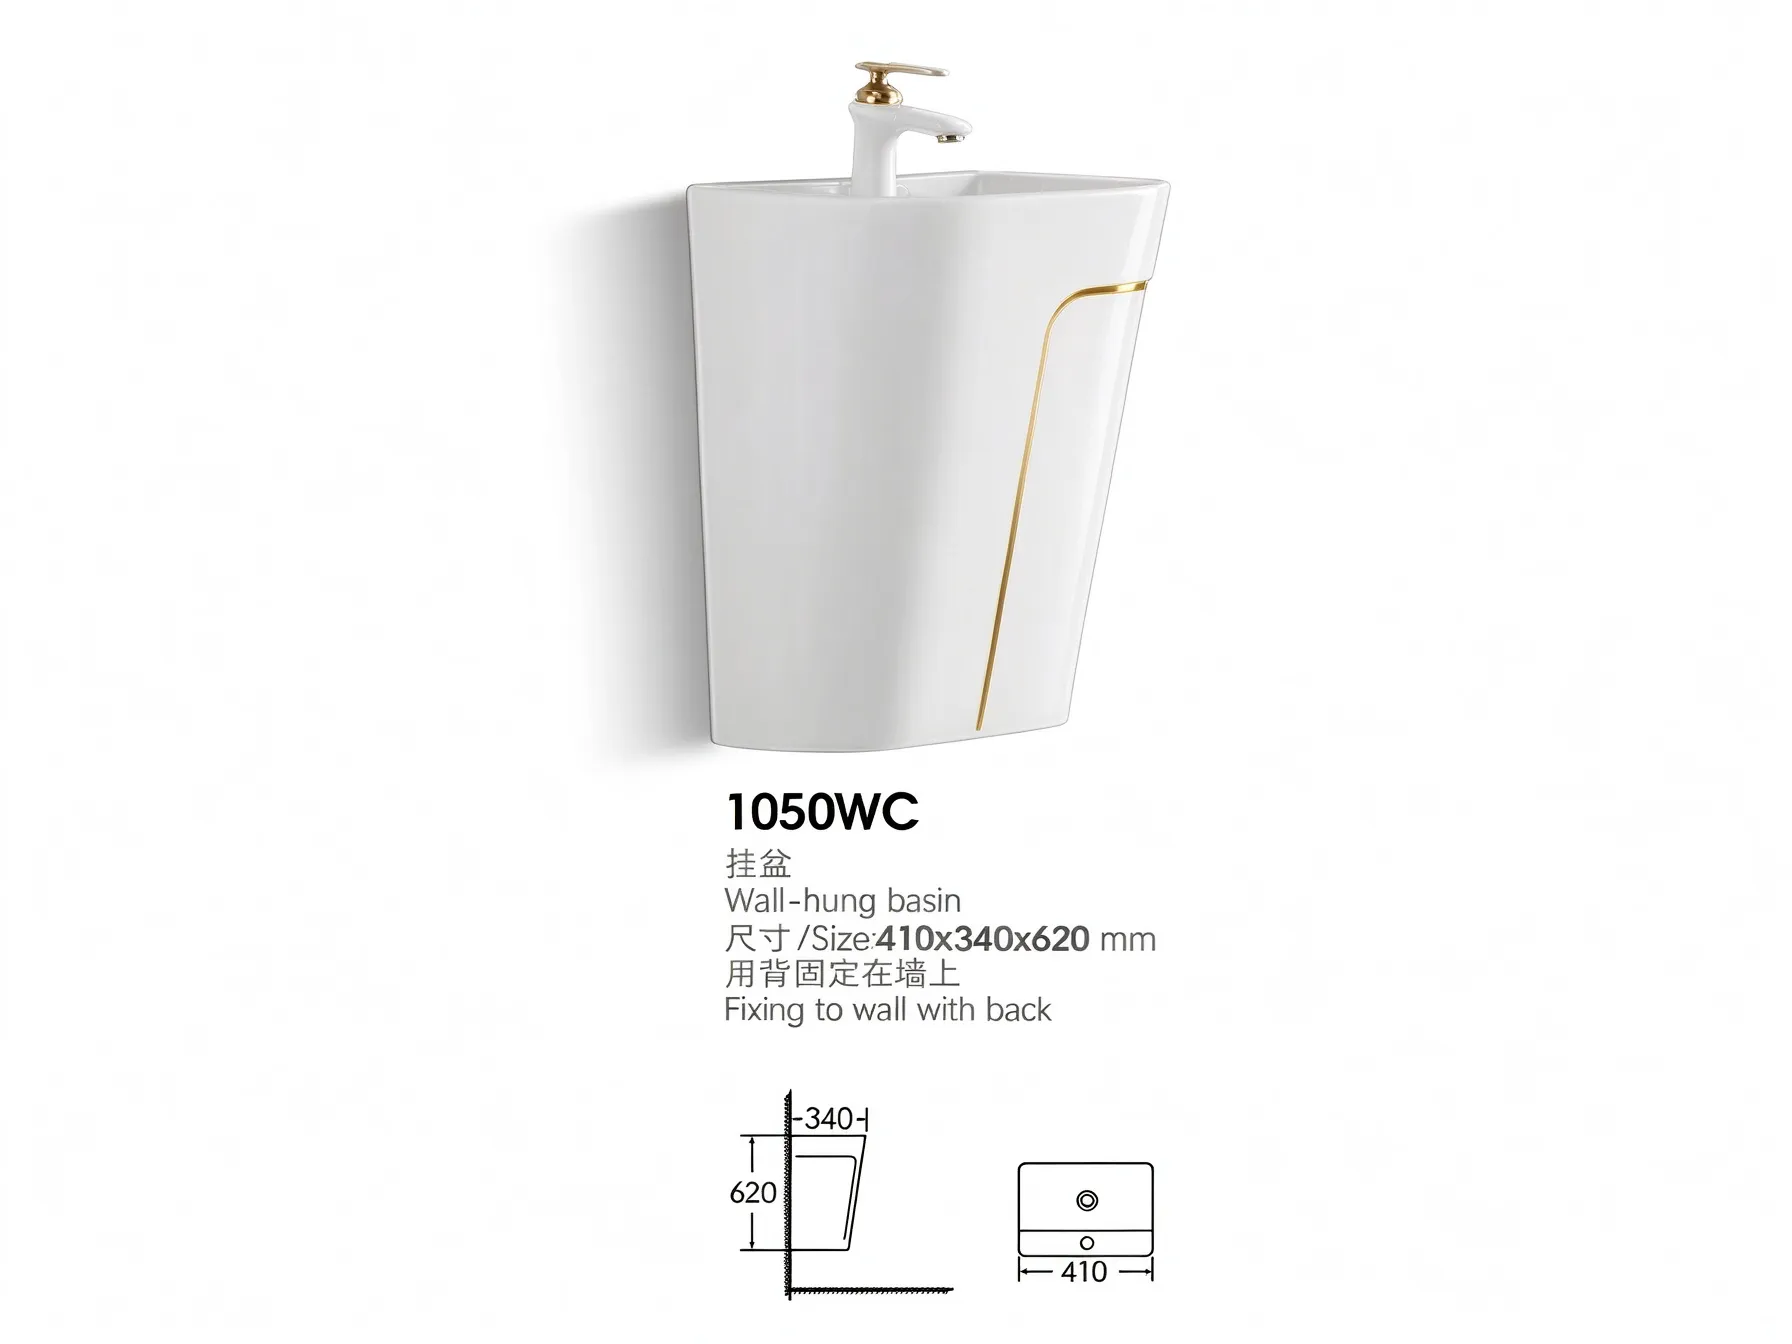
The tall vertical body and gold line of the 1050WC make it a feature basin — plan the wall around it, not the other way round.
Item 1 — Wall substrate and reinforcement schedule
This is the item most often left out of a purchase order, and it is the one that decides whether the installation survives. Your plan should name, for every basin location:
- The wall build-up: masonry, or stud framing with sheathing; the make and thickness of each layer.
- The reinforcement behind the fixing zone — solid blocking, ply backing or a framed batten arrangement — sized to cover the full back panel footprint of the basin, not just the bolt points.
- The fixing method: anchor type and diameter for masonry, or fixings into studs/noggings for framed walls, with the positions marked on setting-out drawings.
- Tolerances. Wall flatness and the finished plaster or tile face dimension should be stated so the basin sits tight to the wall without packing.
Where a project has several bathrooms, put this in a single schedule with one row per location. It gives the builder, the plumber and the joiner one shared reference, and it stops reinforcement being treated as a variation once tiling is underway.
Item 2 — Setting-out drawing with rim heights
Every installation plan needs a dimensioned setting-out for each basin position. At minimum it should show:
| Dimension to fix on the drawing | Why it matters for a tall wall-hung basin |
|---|---|
| Finished floor level and finished wall face | All heights are measured from finishes. A 20 mm difference in screed or tile thickness moves the whole composition. |
| Rim height of the basin | A tall body changes where the usable washing height sits relative to the mirror and faucet. |
| Centre line of the basin and of the waste | Keeps the trap, the tile set-out and any niche or panel behind it aligned. |
| Faucet hole position and spout reach | The faucet hole is pre-drilled on this model, so the spout has to be chosen to suit that hole and the bowl depth. |
| Clear zone below the basin | The open floor beneath is part of the benefit — easy cleaning, no cabinet. Confirm nothing else claims that space. |
Get one drawing issued for construction, with heights referenced to finishes rather than to structural slab. If a project is running several units, issue it as a typical detail plus exceptions.
Item 3 — Rough-in and drainage details confirmed from the technical sheet
Before any wall is closed, the plan must record the rough-in dimensions taken from the current technical data sheet for the 1050WC: waste centre and offset, supply inlet positions, trap arrangement and the clearance needed behind the basin for the connection. These are not values to assume from a similar wall-hung model — a slim vertical body can use a different arrangement from a standard shallow basin.
- Ask for the technical sheet as part of the order, and have the plumber sign off the rough-in against it before first fix.
- Confirm whether an overflow connection is required for the chosen trap, and check that the faucet selected suits the basin arrangement.
- Note access. Once tiled, a re-run means breaking out wall finishes — so pressure-test and visually check the waste before closing the wall.
Item 4 — Faucet, trap and accessories listed together with the basin
A single pre-drilled faucet hole narrows the choices but simplifies the order. The plan should list the faucet by model, with spout reach checked against the bowl, plus:
- Pop-up or click-claw waste and trap suitable for a wall-hung ceramic basin;
- Exposed or concealed connection set, decided early because it affects the wall build-up;
- Walling brackets or fixings supplied with the basin, recorded on the same line as the basin so nothing arrives separately.
Ordering these in one package matters on project work. A basin installed with a mismatched spout, or left sitting in a crate because the trap was on another shipment, is the most common cause of snag-list delays on bathroom fit-outs.
Item 5 — The rest of the 1050 series specified as one set
The 1050WC belongs to a matched sanitary suite, and projects almost always benefit from ordering the set together rather than room by room. Keeping the same gold line accent across a floor or a guest wing is what makes a bathroom look designed rather than assembled:
| Piece | Where it typically goes |
|---|---|
| 1050WC tall wall-hung basin (this model) | Feature powder rooms, boutique hotel restrooms, villa guest bathrooms |
| Wall Hung Ceramic Basin 1050WB | Secondary and smaller bathrooms where a shallower wall basin keeps the room open |
| Freestanding Pedestal Basin 1050B | Master bathrooms and lobbies where a freestanding piece with no cabinet is wanted |
| Washdown One Piece Toilet 1050A | Guest WCs and en-suites that should read as part of the same suite |
List every item, quantity and location in one schedule. It lets the whole bathroom be shipped, checked and installed as a set, and it makes any replacement order straightforward later.
Item 6 — Surrounding finishes coordinated before tiling
A wall basin does not exist on its own. The plan should show how the finishes around it resolve:
- Wall panels and cladding. If the basin sits on a feature wall, coordinate the wall panel system or tile set-out with the fixing zone, so reinforcement and cut-outs land where the drawing says.
- Mirror and lighting. A tall basin raises the composition. Position the LED mirror cabinet or mirror, and the vanity lighting, against the agreed rim height — not against a generic default.
- Adjacent wet areas. Where the basin sits near a shower, agree the fall, the screen setting and the tile line with the rainfall shower system rough-in at the same time.
- Storage. With no cabinet under a wall basin, decide where towels and toiletries go. Recessed niches or a wall-mounted cabinet usually solve it.
Item 7 — Packaging, delivery sequence and site handling
Ceramics are the items most often damaged in transit and the items most needed late. A working plan states:
- Packaging standard and crate marking per location, so crates go to the right bathroom rather than being stored;
- Delivery sequence — basins should land after the wall reinforcement and rough-in are complete, but early enough for inspection on arrival;
- Inspection at goods-in: check glaze, gold line finish and fixing points, and record any damage before installation, since a fitted basin is far harder to claim for;
- Documentation for import: commercial invoice, packing list and the paperwork your customs clearance requires.
For projects supplied from China, SANTERSON's logistics and door-to-door delivery service covers freight forwarding by sea, air and rail, packaging and container loading, shipment tracking and delivery to site. Agree the delivery point and who unloads at each stage of the programme.
Item 8 — Installation method statement and snag list
Close the plan with the sequence the site team will actually follow, written down:
- Verify reinforcement positions and wall face dimension against the setting-out drawing.
- Confirm rough-in dimensions against the technical sheet; pressure-test and check falls before closing the wall.
- Closed wall, tile or panel finish, then set anchors and bracket positions.
- Fit faucet, waste and trap off the wall where access allows, then hang and fix the basin to the back panel.
- Connect, test for leaks at full flow, check the basin for movement under load, seal to the wall line.
- Protect the basin until handover; photograph the concealed services before they are covered.
Attach a short snag list to each location — level, no rocking, no leaks at full flow, glaze and gold line undamaged, sealant line clean. Photographing the reinforcement and rough-in before the wall closes is worth making a standing requirement; it protects everyone if something has to be traced months later.
A pre-construction checklist
- Wall build-up and reinforcement named for every basin location, sized to the full back panel footprint
- Setting-out drawing issued with rim heights referenced to finished floor level
- Rough-in dimensions taken from the current 1050WC technical sheet and signed off by the plumber
- Faucet chosen for the pre-drilled hole, with spout reach checked against the bowl
- Trap, waste and fixings ordered on the same line as the basin
- Matching 1050-series pieces scheduled per room, one combined order
- Mirror, lighting, wall panels and shower rough-in coordinated before tiling
- Delivery sequence, goods-in inspection and import paperwork agreed
- Installation sequence and snag list issued to the site team; concealed services photographed
If every one of those lines is answered before the wall closes, a tall gold-line wall basin installs as cleanly as any standard one — and it does the visual work that a run of cabinetry never will.
Specifying basins and bathroom fit-out for a project?
SANTERSON is a China-based furniture and building materials manufacturer supplying one-stop packages for villa, hotel and office projects — sanitary ware together with vanities, wall panels, lighting, cabinetry and flooring, supported by custom/OEM service, door-to-door logistics and installation and after-sales support. Send us your room schedule or drawings and we will return a matched specification with dimensions, quantities and a delivery plan for your programme.