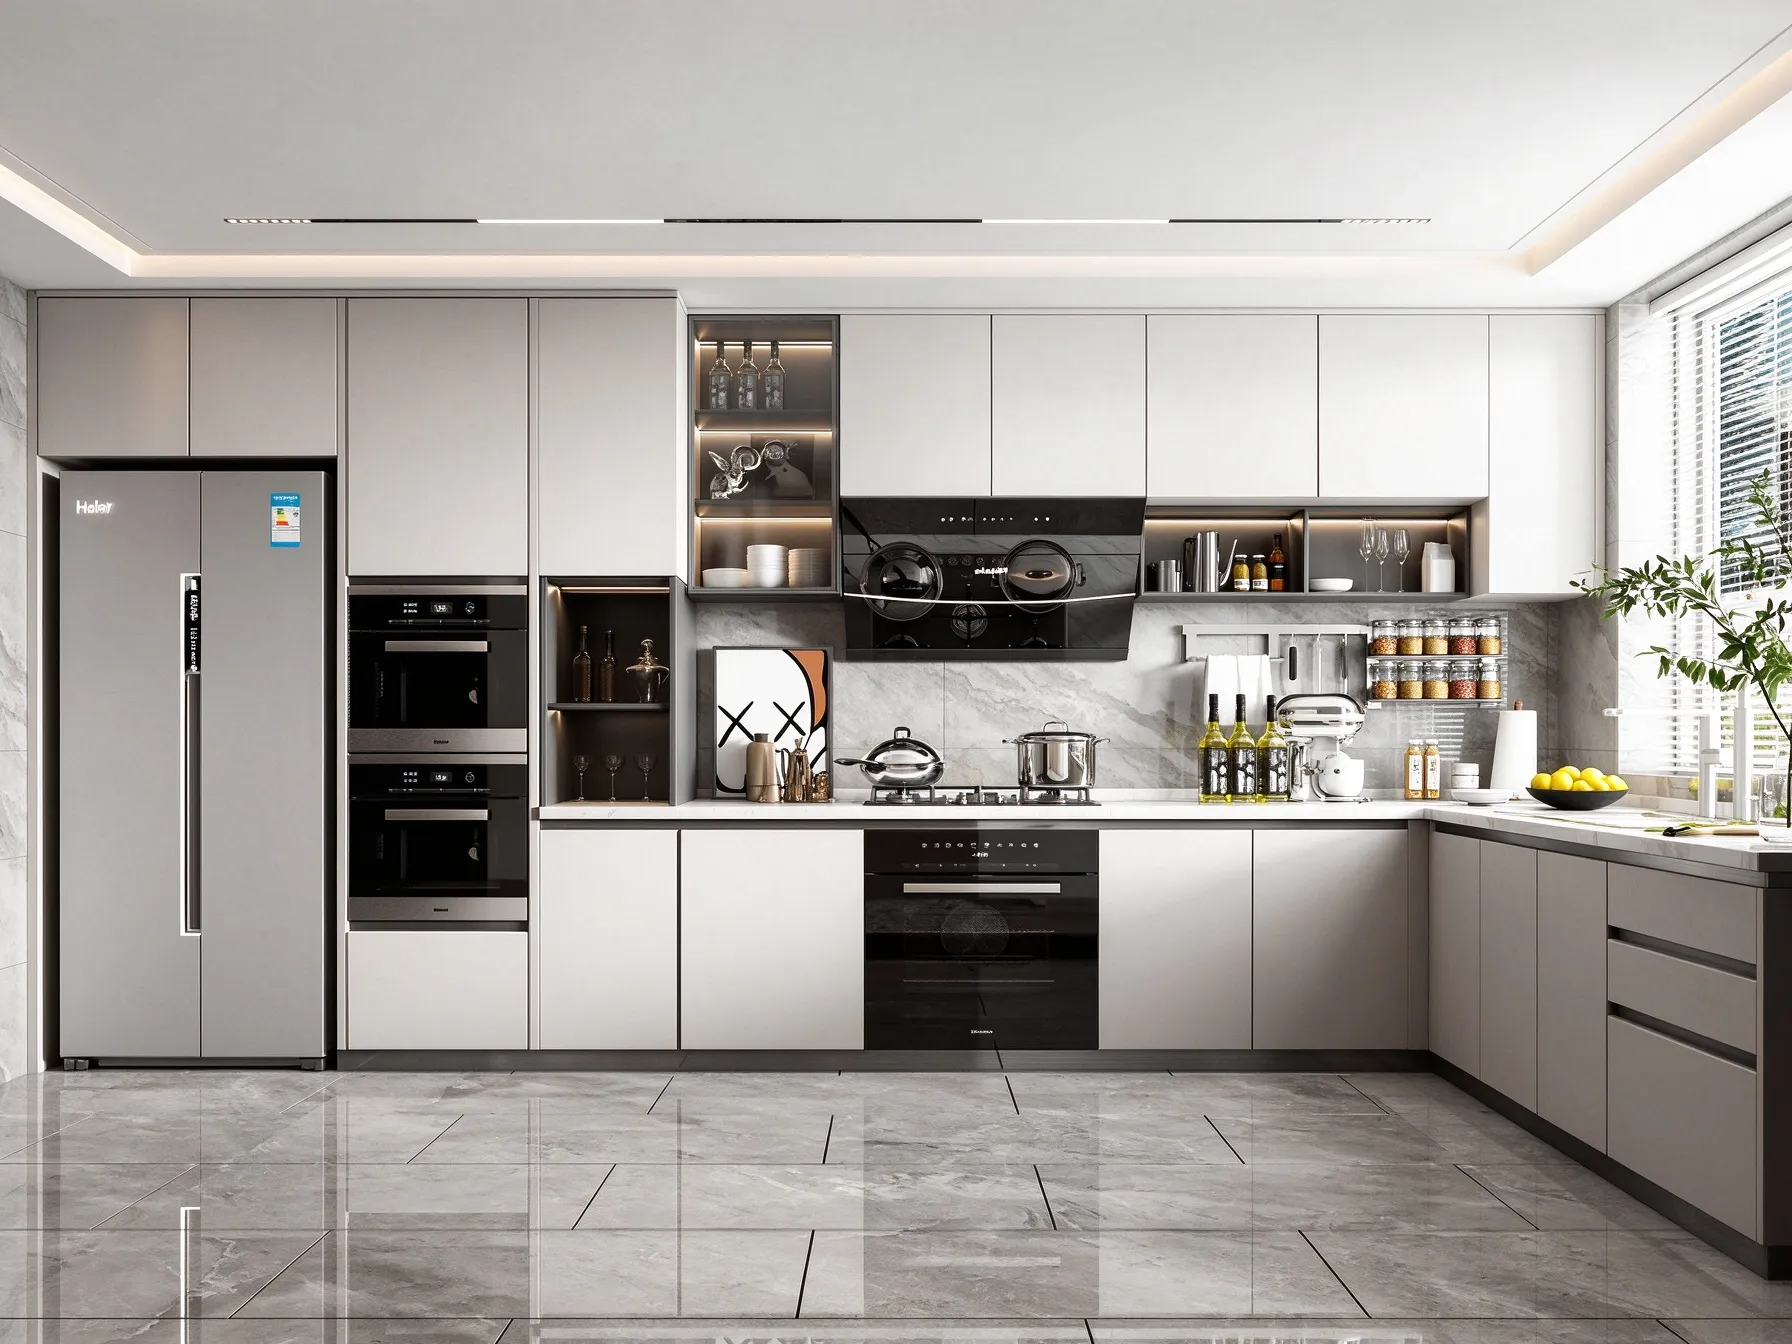
Grey flat-panel cabinets with an illuminated glass wine display look straightforward on a rendering, which is exactly why they get approved too early. The finish, the glazing, the lighting and the appliance housing sit in different supply packages, and each one needs a sign-off before production starts. Below is the confirmation list we ask project teams to close out before a grey modern kitchen cabinet with LED glass wine cabinet goes into manufacturing - for villas, apartment fit-outs and boutique hotel renovations.
Why this cabinet type needs more sign-off than a standard run
A conventional grey kitchen is mostly joinery: panels, carcasses, worktops, hardware. Add a full-height glass display with integrated lighting and a stack of built-in ovens, and the same job now involves glazing, low-voltage electrics, appliance cut-outs and a stone splashback that has to reconcile with all three. Two-tone grey schemes make this harder, not easier. Layered light and dark panels read as one clean surface when they are aligned, and read as a mistake when the reveal between an upper door and a tall housing is off by a few millimetres.
The same logic applies across our light and dark grey modern kitchen cabinets: display cabinets, counter lighting and integrated appliances are specified item by item, then coordinated as one assembly before anything is cut.
1. Confirm the grey, in the finish, on a physical sample
- Fix the door specification first: flat panel, shaker profile or handleless. A handleless detail changes door thickness, reveal sizes and how the tall housing meets the wall.
- Approve the grey on a sample of the actual production panel, not a colour chip or a rendering swatch. Warm and cool greys shift under LED strips and under daylight from a window wall.
- Decide matte or gloss for each run, and check the two-tone break - where light grey stops and dark grey starts - against the appliance stack, so the split does not cut through an oven door.
- For repeat apartment types, hold one approved sample set per unit type. A photograph of a mock-up is not a substitute when several floors are fitted out to the same detail.
2. Confirm the glass: type, tint and how it opens
- Specify clear, bronze or frosted glazing for the display, and confirm whether the framing is aluminium or matched to the door panel.
- State the glass thickness and edge finish the frame expects; a display door that sags or rattles is a specification problem, not a site fix.
- Confirm the opening method - hinged, sliding or lift-up - and the clearance each method needs from adjacent tall units and from appliance handles.
- Decide the internal layout of the display: bottle racking, stemware rails, or flat shelving for tableware. This affects shelf spans and load ratings, so it cannot be left to site.
3. Confirm the LED lighting as an installable package
Built-in warm LED lighting is usually the least-specified part of a glass cabinet. Before approval, close out:
- Where the driver sits and how it stays accessible for replacement - in a service void, behind a removable panel, or under a plinth.
- Switching: door-activated, a wall switch on the kitchen circuit, or a sensor. Coordinate this with the electrical contractor's first-fix drawings.
- Colour temperature and dimming behaviour, checked against the strip that lights the work surface. Mixed temperatures across one run read as an error in photographs.
- Whether the light source is supplied with the cabinet or sourced locally. If it is local, confirm the part number now, because the housing profile has to match it.
4. Confirm appliance integration against real datasheets
Tall housings that stack double ovens look simple on a layout drawing. The dimensions that matter come from the appliance data sheets: niche size, ventilation requirement, door swing, handle projection and electrical load. Sign these off against the exact models selected for the project, not an equivalent model.
- Appliance make and model fixed per unit type, with the datasheet attached to the shop drawing.
- Ventilation route confirmed with the joinery package and the mechanical trades before the housing is built.
- Handle and door projections checked against walkway widths, especially on L-shaped layouts where the working triangle is tight.
- Power positions confirmed for ovens, refrigerator columns and coffee machines, with the electrician's drawing cross-checked against the cabinet elevations.
5. Confirm the stone splashback meets the joinery
Marble-pattern stone splashbacks in these schemes are chosen for a wipe-clean surface and a stain-resistant appearance, which suits high-use kitchens. The approval detail is the junction: where the stone meets the worktop, the side return, and the base of the glass cabinet. Fix the slab thickness, the edge profile and whether the stone runs behind the appliance stack before the carcasses are set out on site.
6. Confirm scope, tolerance responsibility and sequencing
For project orders, the practical question is who owns what. Custom cabinetry means dimensions, internal partitions, panel colours and surface finishes are drawn per project, so the shop drawing package becomes the contract document. Our custom built-in kitchen cabinets are supplied as interior fixtures with matching hinges, drawer runners, support legs and connecting brackets, which keeps one supplier accountable for the assembly instead of splitting it across three vendors.
- Site survey of the actual openings - levels, plumb, finished floor height - before final dimensions are released.
- Written sign-off on the shop drawings by the architect or client representative, including the glass and lighting details.
- A named order of precedence: electrical first fix, then carcasses, then stone, then appliances and glazing, with the snag list closed at handover.
- Delivery sequence matched to site storage. Glass doors and tall housings should arrive when they can be installed, not stacked in a corridor.
7. Confirm logistics and installation before the order is placed
Cabinetry, stone and glazing travelling together need packaging that survives the last leg to site. We arrange freight by sea, air or rail with customs paperwork and door-to-door delivery, so the same team tracks the shipment through to arrival rather than handing over at a port - see furniture logistics and door-to-door delivery. On arrival, installation, snag inspection and after-sales support follow the same package - see installation and after-sales support.
Practical rule: if a detail is not drawn, someone on site will decide it. Every item above should appear on the shop drawing package before production is released.
Related grey cabinet schemes on santerson.com
- Black and light grey L-shaped kitchen cabinets with LED glass display and stacked ovens - useful where the working triangle needs to stay compact.
- Modern blue grey minimalist kitchen cabinets with matte flat panels and an illuminated open display shelf.
- Handleless minimalist kitchen cabinets with soft-close hardware, for projects that want continuous surfaces with no protruding ironmongery.
- The kitchen cabinets and hotel appliances category, where the grey range is listed alongside project-specified cabinetry.
Where this sits in a wider fit-out
Kitchens rarely travel alone on villa and hospitality jobs. Flooring, wardrobes, wall panelling, lighting and bathroom fixtures are usually procured against the same finish schedule, and grey cabinetry sets the tone for the rest of it. Coordinating those packages with one supplier through turnkey interior project solutions keeps finishes consistent across trades and shortens the coordination chain on site.
Send the drawings before you approve the grey
Share your kitchen elevations, appliance selections and unit-type schedule, and we will return a shop drawing package showing the glass specification, lighting positions, appliance niches and finish samples for sign-off - as part of our interior design service. Contact PHILLIP at santerson@qq.com, or by phone and WhatsApp on +86-13928214007.