
A swim spa shell is ordered once and replaced rarely. On Outdoor Swim Spa WS-S38, the visible surfaces — shell colour, cabinet cladding, jet faces, lighting tone and steps — are exactly the items a buyer cannot change once shell forming and cabinet fabrication have started. Reviewing physical finish samples before production is therefore not an optional courtesy step; it is the cheapest control point in the whole order. The following checklist shows what to ask for, what to compare, and what to sign off on before our factory releases WS-S38 into serial production.
What "finish sample" means on this model
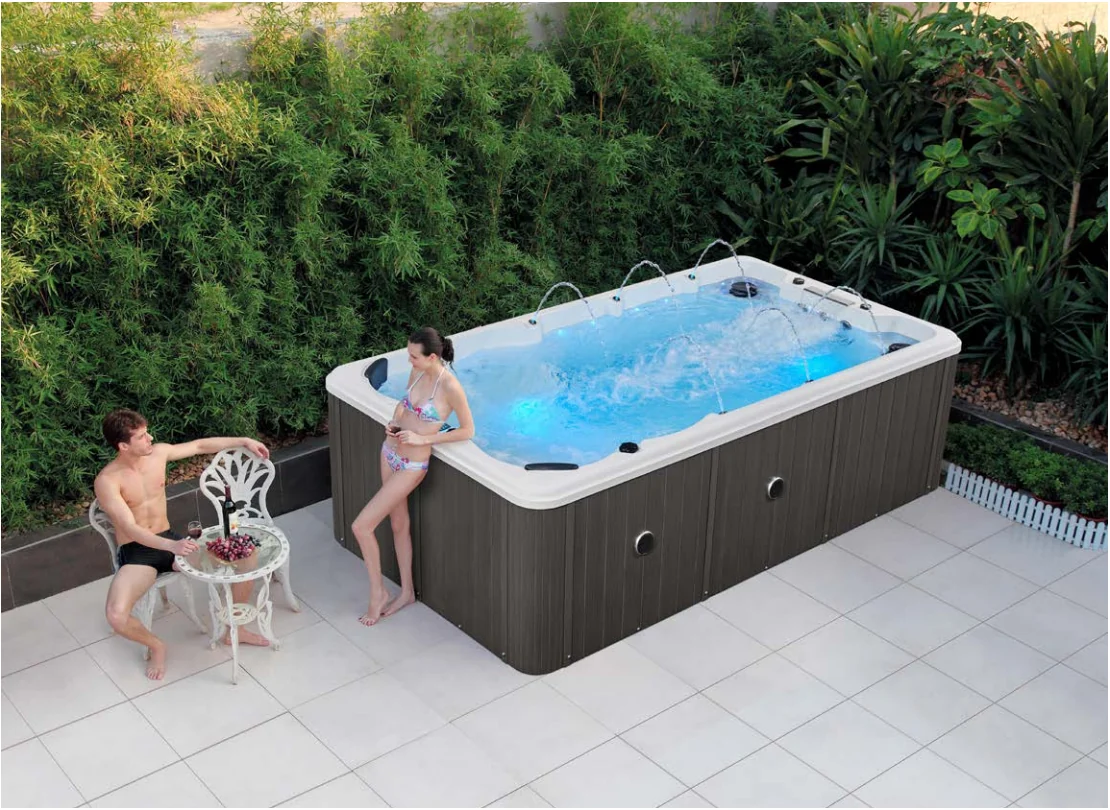
WS-S38 sits in our configurable outdoor swim and hydrotherapy range, catalogued at 3760 × 2080 × 1110 mm with 51 jets including six water columns, four LED fittings plus twelve small LEDs, ozone and a waterfall feature. Because the shell, the jet hardware and the lighting are all specified rather than fixed, a sample review on this model covers three separate groups of surfaces:
- The wet surface. The interior shell that holds water and carries the jets, return inlets and LED housings. Colour depth, gloss level and texture are read here.
- The exterior cladding. The cabinet or skirt panels that face the terrace, pool deck or garden. These are the surfaces a guest or homeowner sees from the outside every day.
- The small hardware. Jet faces, control panel fascia and step components. Individually minor, but they set whether the whole unit reads as designed or as assembled.
Ask for one sample per group, not a single "colour card". A printed card cannot tell you how a shell colour behaves under water at 1,110 mm depth, and it cannot tell you how a cladding panel weathers.
Step 1: Lock the specification sheet before any sample is made
Samples are only useful if they represent the configuration you will actually buy. Before requesting them, confirm the specification in writing:
- Shell colour and gloss level for the wet surface.
- Cabinet or skirt cladding material and colour on all four visible elevations.
- Jet count and layout as configured — the catalogue shows 51 jets with six water columns for WS-S38, and repositioning jets after the shell is made is not practical.
- LED fittings as configured: four main lights plus twelve small LEDs, and the colour temperature or colour mode you expect at night.
- Ozone system and waterfall feature included or omitted.
- Which optional accessories are in scope: control system, UV sterilisation, water pumps, heat pump, sand filtration, insulation and steps.
- Total installed power for your configuration. The catalogue figure for WS-S38 is 14.05 kW across three water pumps and one filter pump; the confirmed figure for your build is what your electrician needs to work from.
Our product listings state that included equipment and electrical requirements must be confirmed for the selected configuration. Treat the sample request as the moment when that confirmation becomes physical and signed, not an email thread.
Step 2: Judge the wet surface where it will actually be seen
Shell colour is the single most consequential finish decision. A sample that looks right on a desk can read pale, milky or overly dark once it is underwater and lit from below.
How to test the shell sample
- View it dry and wet. Submerge the sample in a clear container of water at an angle close to the real installation. Compare the wet reading against your design intent, not against the brochure photo.
- Test it under the lighting you are buying. Shine the LED sample or a comparable light source through the water. Cool white on a pale shell gives a clinical pool look; warm white shifts the whole tone. Decide with light on, not off.
- Check gloss and texture consistency across the sample area. A finish that looks uniform on a small cut-off can show forming or coating variation once it is stretched over a full shell wall.
- Scratch test lightly with a fingernail or coin on an off-cut edge to understand how the surface behaves against grit, swimwear hardware and cleaning cloths.
- Check colour match at the jet line. Request that the sample includes a jet face mounted in the shell material. This is where colour contrast between acrylic shell and plastic hardware becomes visible.
If the same project also calls for a spa in a non-rectangular footprint, our Customizable Shape Outdoor Spa - Personalized Hydrotherapy Pool covers square, round, oval and curved shells. Request the shell samples from the same batch so spa shells match across units.
Step 3: Judge the exterior cladding against the site, not the showroom
The cabinet finish is chosen for a specific terrace, deck or garden — often in strong sun, sometimes near salt air. Evaluate it in those conditions.
- Tape the sample to the actual installation wall or deck edge and look at it at midday and at dusk. Sunlit exposure shifts both colour and gloss perception.
- Compare against the surrounding fixed finishes — decking, paving, external wall cladding and any Wall Panels and Wall Cladding already specified for the exterior. The spa should read as part of the palette.
- Check edge treatment on the sample. Cut edges, corner profiles and any visible fasteners matter more than the face colour once the unit is installed above ground.
- Ask what the sample's coating system is and how it is cleaned. A finish that needs specialist products adds recurring cost to a hotel or villa operation.
Where the spa sits within a wider outdoor package, request the cladding sample alongside finishes for the Outdoor Furniture range used on the same terrace, so cabinet tones and frame tones on loungers and pergolas are decided in one review rather than three.
Step 4: Review the hardware and lighting samples together
Small components are where a well-specified spa starts to look generic. Put them on the same table as the shell and cladding samples.
| Item | What to check on the sample |
|---|---|
| Jet faces and water column nozzle | Colour against the wet shell; face profile proud or flush; whether the jet pattern reads as intended at spa depth |
| Control system fascia | Legibility in direct sunlight and at night; button and display finish after handling |
| LED fittings (4 main + 12 small) | Tone consistency between the two fitting types when lit together; no colour shift between fittings from the same batch |
| Waterfall feature edge | Lip finish and water sheet behaviour; no sharp edges on the visible spillway |
| Steps | Tread surface colour and slip texture; how the step profile meets the cabinet cladding |
| Insulation and cover components (if specified) | Surface quality of visible insulation faces; closure hardware finish |
Order all samples from one production batch. Jet faces, cladding and LED fittings sourced or produced at different times are the most common cause of a finished spa looking mismatched even when every individual item was approved.
Step 5: Record the sign-off so production has one reference
Once samples are approved, make them the controlling reference. A short written record keeps what you approved and what reaches the production line aligned:
- Photograph every approved sample with the project name and model (WS-S38) visible.
- Note the reviewer, the date and the viewing conditions used for the wet-surface check.
- List any rejected samples and the reason, so a substitute is proposed rather than quietly decided.
- Confirm in writing which accessories are included in the approved configuration and which are excluded.
- Keep one physical set of samples on site. Photographs alone cannot settle a colour dispute at handover.
This record also protects the buyer side. When finish expectations are documented against physical samples, inspection at delivery becomes a comparison rather than an argument.
Step 6: Decide sample scope by order size
A single villa spa and a multi-unit hospitality order need different levels of sample work:
- One unit, private residence. Shell colour, cladding colour and one hardware set. Review in the garden once, then sign off.
- Bulk or project order. Full sample set per configuration, plus a retained reference set for incoming inspection across all delivered units.
- Project spanning several product categories. Coordinate the spa samples with Turnkey Interior Project Solutions, so exterior finishes, outdoor furniture tones and interior fixtures are approved against one palette instead of category by category.
For specification work beyond the standard catalogue sizes, our Custom Furniture Manufacturer service covers bespoke material finishes and textures alongside sizing, which is where a sample review earns its keep most quickly.
Common sample-review mistakes
- Approving colour from a digital render alone. Renders cannot show how a shell tone behaves under water and LED light. Physical samples only.
- Reviewing indoors. Exterior cladding must be read in the sunlight and at the viewing distance of the real site.
- Ignoring electrical scope during the finish review. Power, pump count and control configuration are confirmed at the same sign-off; a finish approval that leaves them open delays production regardless of colour.
- No retained reference set. Without one physical approved sample kept on site, there is no agreed benchmark at handover.
Before you request samples
Send us the model reference (WS-S38), your confirmed configuration — jets, lighting, ozone, waterfall, and any of UV sterilisation, heat pump, sand filtration, insulation or steps — plus a photo of the installation setting and the fixed finishes it must sit against. We will prepare the corresponding finish samples for shell, cladding and hardware so the review happens once, before production starts.
Dimensions, jet counts, lighting counts and power figures quoted above are catalogue values for WS-S38; confirm the specification for your selected configuration with our team before ordering.