
A wood and taupe handleless kitchen looks effortless on the day it is finished, which is exactly why the work behind it is easy to underestimate. Handleless cabinetry removes the hardware that normally gives installers something to grip and something to adjust, so every door gap, every reveal and every wall junction becomes visible in the completed run. A flat panel with no handle will expose an out-of-plumb wall, an uneven floor or a badly set carcass far more quickly than a shaker front with a knob on it. That is why this style of kitchen needs a written installation plan before the cabinets are made, not after they arrive.
The plan below covers what a procurement team, builder or designer should have agreed and documented before wood & taupe handleless kitchen cabinets are released for production, and what has to be settled on site before the first carcass is fixed.
Why handleless cabinetry needs a plan written earlier than usual
With a hinged, handled door, small dimensional errors can be absorbed at the fitting stage. With a handleless flat panel they cannot. The profile that lets a door be opened without a handle — whether it is a rebated edge or a channel rail — depends on consistent spacing between doors and between a door and an adjacent wall. If the opening the cabinets are being fitted into varies by more than a few millimetres over its length, the run will either need scribing at both ends or a filler panel that breaks the line of the design.
Two further points make early planning worthwhile. First, the wood grain doors and the matte taupe doors in this scheme are different surfaces with different tolerances for how they are cut and edged, so mixed runs should be dimensioned as a set rather than ordered as separate items. Second, the built-in oven position and the lit open shelving are fixed elements in these layouts: their positions have to be known before the carcasses around them are sized, because moving an appliance tall unit on site means re-cutting panels that carry the visible grain.
Rule of thumb for this style: if a decision changes what is visible from the room — a door size, an appliance position, a shelf width, a finish boundary — it belongs in the plan before production. If it only affects how a carcass is fixed to the wall, it can be settled on site by the fitter.
Section 1: The measured survey
Nothing in the plan is reliable until the space has been surveyed properly. A drawing taken from architectural plans is not a substitute for a site measure, and for a handleless kitchen the survey should record more than overall length.
- Overall run lengths at floor level and at head height, so any difference between the two is known before sizing.
- Plumb and level checks on every wall the cabinets bear against, taken at several points along each wall rather than one.
- Floor level across the full run, including any transition to an adjoining floor finish.
- Ceiling height and the position of any bulkhead, soffit or service duct that affects a tall unit or wall cabinet.
- Positions of soil stacks, waste pipes, water feeds, isolating valves and electrical outlets, with heights from the finished floor.
- Door and window openings, opening directions, and the clearance needed for them to swing past the cabinetry.
- The finished floor build-up, confirmed in writing, so cabinet heights are set against a completed level rather than a screed.
Where an existing wall is badly out of plumb, decide in the plan whether it will be rectified by the trades on site or absorbed by scribing and filler panels. Both approaches are legitimate; what causes trouble is leaving the choice open until the cabinets are standing in the room.
Section 2: Layout and appliance decisions that must be closed before production
The work triangle and the traffic lines
Settle the sink, cooking and refrigeration positions first, then check that a person can move between them without crossing a dishwasher or oven door left open. In an apartment kitchen where one wall does most of the work, this is usually where the plan needs a second pass.
Appliance schedule
Handleless kitchens in villa and apartment projects typically integrate the appliances into the same flat-panel language as the doors. Every integrated appliance has to be named in the plan with its exact model, dimensions, ventilation requirement and door-fixing method, because the cabinet around it is built to that unit.
| Element in the plan | What must be recorded | Why it matters for handleless work |
|---|---|---|
| Built-in oven position | Appliance model, niche size, height of the niche base above finished floor, adjacent carcass widths | The tall unit framing the oven carries visible grain panels; resizing on site is visible. |
| Refrigeration | Integrated or freestanding, door hinge side, ventilation gap at the rear and top | Ventilation gaps change the carcass depth and the return detail. |
| Dishwasher and sink unit | Waste and supply positions, door panel fixing type, plinth continuation | A handleless plinth has to run continuously; an interruption reads as a fault. |
| Hob and extraction | Hob cut-out size, duct route, whether extraction is ducted or recirculating | Duct routes often dictate wall cabinet depth and the ceiling junction. |
| Open display shelving | Shelf widths, shelf depths, lighting position and driver location | Lit shelving needs a concealed feed; the driver has to be accessible after fixing. |
Internal storage specification
The internal layout is far cheaper to change on paper than in the workshop. Specify which base units take pan drawers, where pull-out larder racking sits, which corners take a carousel or magic corner, and where cutlery and small-appliance divisions are needed. This is also the moment to agree the hardware set — hinges, drawer slides, lift fittings and soft-close mechanisms — and to confirm that the chosen opening mechanism suits a handleless front, since the door has no handle to pull on.
Section 3: Materials, finishes and the sample sign-off
A wood and taupe scheme lives or dies on two surfaces meeting. The warm wood grain panel and the matte taupe flat door have to read as a deliberate pairing, which means the exact panels should be approved physically before production rather than from a screen.
- Approve a physical sample of both the wood grain panel and the matte taupe door, and look at them together in the actual room lighting at two times of day.
- Confirm where one finish ends and another begins — for example where taupe doors meet a wood grain tall unit, and how that boundary is detailed.
- Agree the worktop and splashback with the same sign-off, including the edge profile and how the worktop meets the wall and the cabinetry.
- Confirm the board and surface specification for wet and high-use zones, and keep the supplier's written maintenance guidance for handover to the client or building operator.
- For apartment blocks and boutique hotel schemes, order a full sample set of every panel and door type in the package so that replacements later match the approved reference.
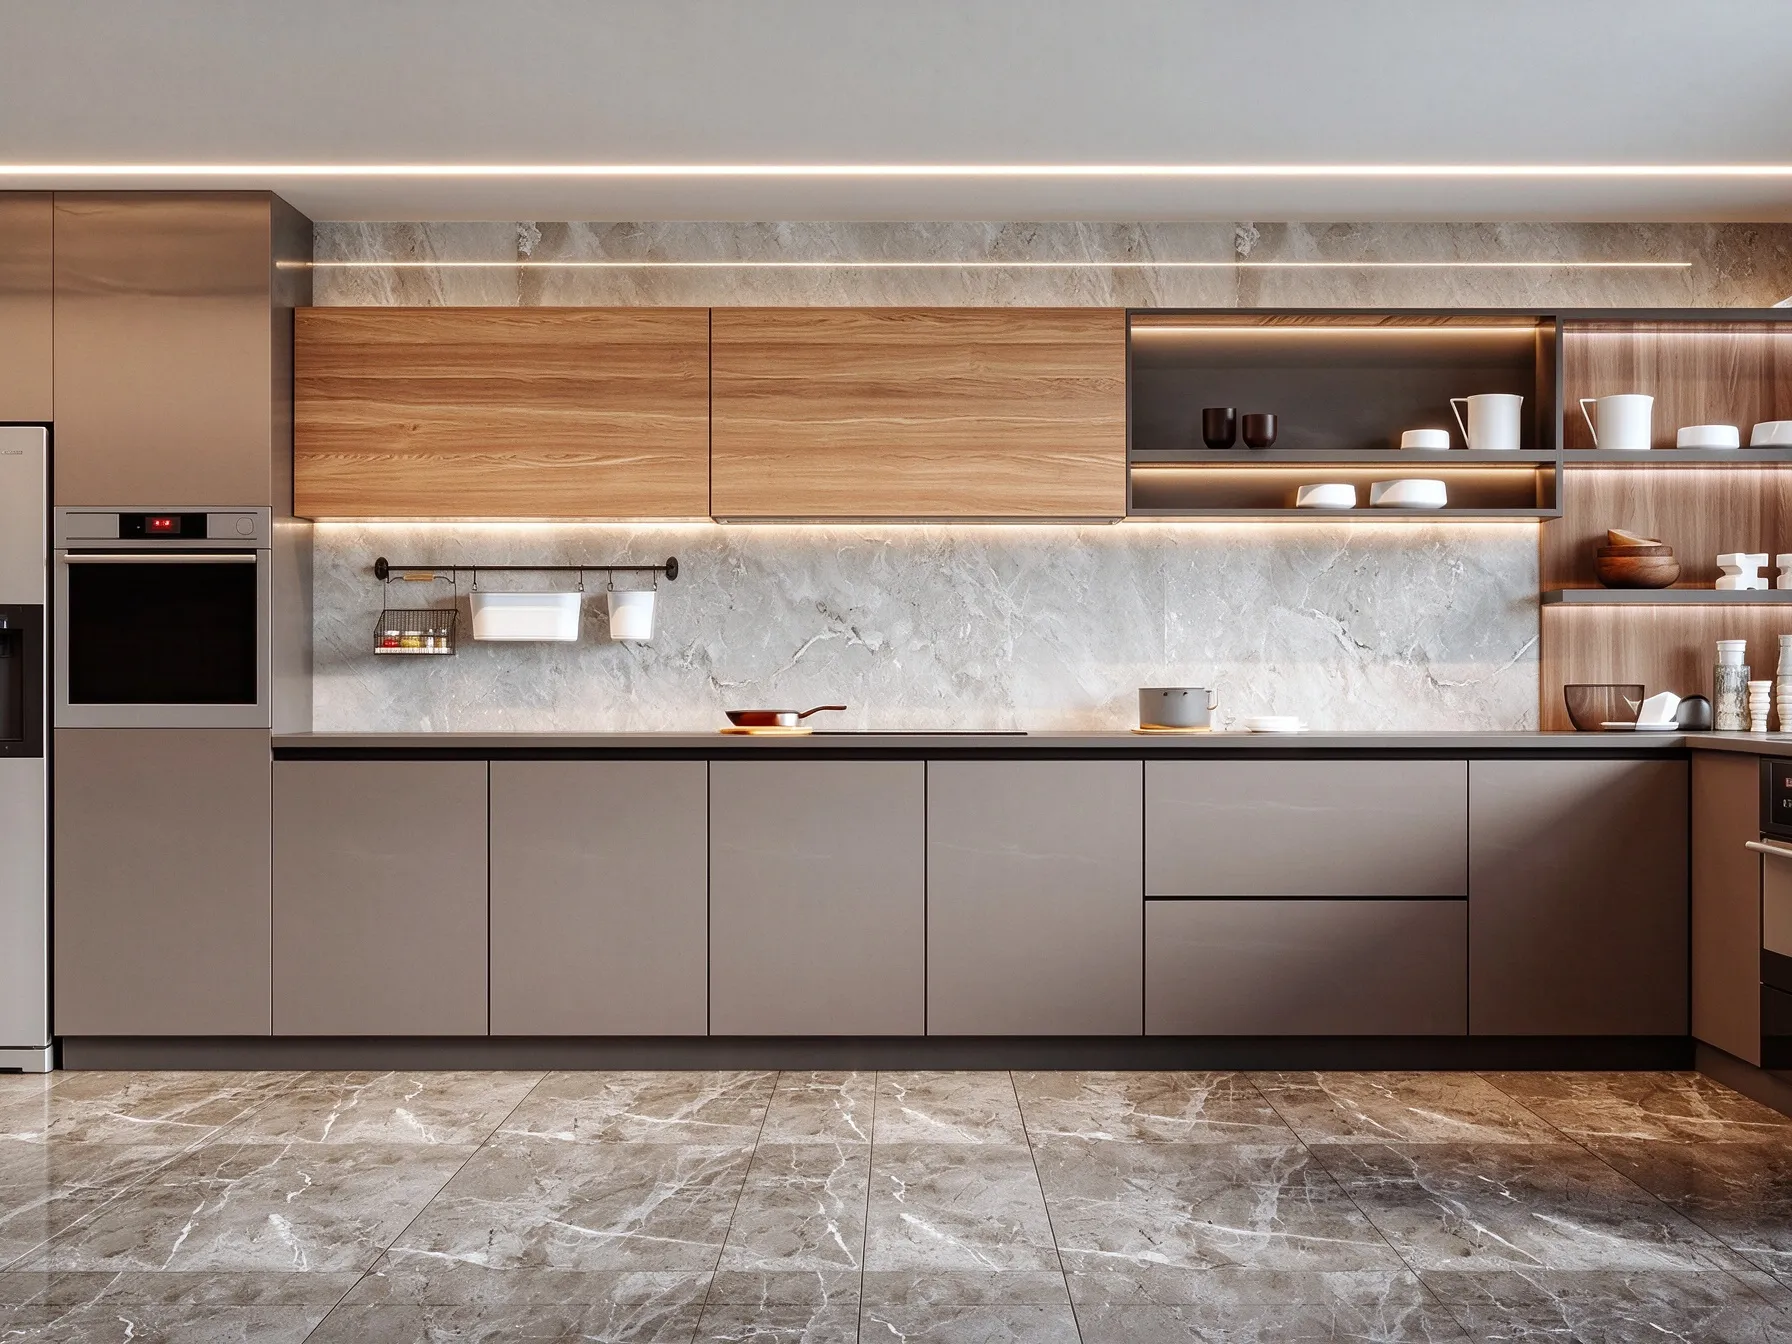
Wood and taupe handleless cabinetry: flat panel doors, LED-lit open shelving and a reserved built-in oven position. Use the approved sample set to confirm how these surfaces read together on site.
Section 4: First fix and services coordination
Once the layout is fixed, the services have to follow it rather than the other way round. The installation plan should carry a coordinated drawing showing where pipework, waste, supplies, sockets and the lighting feed for the lit shelving sit in relation to specific carcasses, together with who is responsible for each.
- Waste and supply positions set to the sink and dishwasher units, not left for the plumber to guess.
- Power outlets positioned so they sit behind the intended appliance carcasses and remain accessible for servicing.
- Lighting feed for open shelving run to the agreed shelf position, with the driver left reachable after installation.
- Appliance connections confirmed against the named models on the schedule.
- Any undercounter or in-cabinet lighting and its transformer location recorded on the drawing.
Where wall cabinets hang on a wall that will not carry the load as built — a common situation with partitions in new apartments — the plan should state the fixing solution agreed by the builder and the cabinetry supplier before the wall is closed up.
Section 5: Delivery, storage and site readiness
For a project receiving a kitchen from overseas, the delivery sequence belongs in the plan as firmly as the technical detail. Panels with visible wood grain are the components most easily damaged on site, so the schedule should protect them.
- Confirm the delivery address, access route and unloading arrangements, and whether the site can receive a container or needs a smaller vehicle transfer.
- Check packaging and pallet labelling against the room-by-room packing list before signing for the shipment.
- Inspect each package on arrival for transit damage while the carrier is still present, and photograph anything damaged immediately.
- Store panels flat, dry and indoors, off the floor, away from the trades doing wet work. Do not open door panels until fitting day.
- Keep the packing list, drawings and approved sample set together in one place for the fitter's reference.
The site itself should be ready before the cabinets land: floor finish complete, walls painted or at least made good on the faces the cabinets touch, plaster fully dry, first fix tested, and heating available if the space is cold and damp. Flat panel doors installed into a room still drying out invite problems that show up months later.
Section 6: The fitting sequence
A sensible handleless installation follows a fixed order, and the plan should name who carries out each stage and what has to be checked before the next one starts.
| Stage | What happens | Check before moving on |
|---|---|---|
| 1. Set the base run | Base carcasses levelled and scribed to the floor and walls, then linked | Level along the full run; fronts in one plane; plinth line continuous |
| 2. Tall units and appliance housings | Oven, larder and refrigeration carcasses set to the drawing | Niche sizes match the named appliances; ventilation gaps correct |
| 3. Wall cabinets and open shelving | Wall units fixed to the agreed substrate; shelves and lighting fitted | Fixings correct for the wall; lighting driver accessible; shelves level |
| 4. Doors, drawers and hardware | Handleless fronts hung, slides and soft-close fittings fitted | Even gaps throughout; no rubbing; opening mechanism works on every front |
| 5. Worktop and splashback | Worktop templated or fitted, joints to wall sealed, hob cut out | Cut-outs match appliances; seals clean; no visible gaps at the wall |
| 6. Connection and commissioning | Appliances connected, extraction checked, waste tested | No leaks; appliances operate; drawers and doors still aligned after use |
| 7. Snagging and handover | Final alignment, cleaning, punch list closed out | Signed snag list; care guidance and spare-parts contact passed to the client |
Section 7: Snagging items specific to handleless kitchens
General snagging will not catch what goes wrong on a handleless run. Add these to the punch list:
- Door gaps consistent from top to bottom of every door, and identical between adjacent doors.
- Fronts flush at corners and at returns, with no lip that catches a hand or sleeve.
- Every front opens cleanly without needing to be gripped — check each one, including the heaviest tall-unit doors.
- Wood grain direction consistent across all panels in a run and matched at any boundary with taupe doors.
- Plinth continuous and scribed neatly to walls and corners.
- Worktop edge and splashback junctions sealed without visible mastic runs.
- Drawer fronts square under full load — pull each drawer out, load it, and check alignment again.
Section 8: Handover documents to include in the plan
Close the plan with what the client or building operator receives. For a rental apartment, a serviced villa or a boutique hotel kitchen, this is what makes future maintenance straightforward.
- As-built layout drawing with the final dimensions and any on-site changes marked up.
- Appliance schedule with models and serial numbers.
- Hardware specification, so replacement hinges, slides or lift fittings can be ordered correctly.
- Approved finish references for both the wood grain panels and the taupe doors.
- Surface cleaning and maintenance guidance from the panel supplier.
- Warranty terms, spare-parts route and after-sales contact, as confirmed in writing for that order.
Working with a one-stop supplier on the plan
Where cabinetry is being ordered alongside other fit-out items from the same manufacturer, the installation plan is easier to keep coherent when one party holds the drawings for the whole package. Custom built-in kitchen cabinets can be made to the surveyed dimensions with the internal partitioning, door style and surface finish specified per unit, which is what a handleless scheme requires. Related styles in the same flat-panel language — such as handleless minimalist kitchen cabinets for a plainer run, or handleless European cabinets — can be reviewed against the same survey if the wood and taupe pairing is not right for a particular unit type.
A supplier that also handles production, packing, freight and door-to-door delivery should have its logistics stage reflected in Section 5 of the plan: packaging standard, container loading plan, arrival date, and who inspects at unloading. Ask for written confirmation of lead time, delivery terms and after-sales scope for your specific order rather than relying on general service descriptions, and get those terms into the purchase documentation before production begins.
Before you release the order
The short test: could an experienced fitter receive this package, open the plan and install the kitchen without making a single decision that changes how the room looks? If any visible element — a door size, an appliance position, a finish boundary, a shelf width — is still open, it belongs in the plan. Settle the survey, close the appliance schedule, sign off physical samples of both surfaces, coordinate first fix to the layout, and protect the grain panels on site. Handleless work rewards that discipline with a kitchen that reads as one continuous surface; skip it, and every small error stays on display.