
An arched paneled wardrobe reads beautifully on site, but it is one of the hardest items in a joinery package to buy well. The curve changes how doors are built, how panels meet walls, and where tolerances have to be absorbed. Most problems we see on wardrobe projects are not design problems at all — they are quantity and coordination problems that were settled too late. This guide walks through how to count what you need for Arched Paneled Wardrobes and how to keep the surrounding products aligned so the package arrives as one coherent set rather than three separate orders.
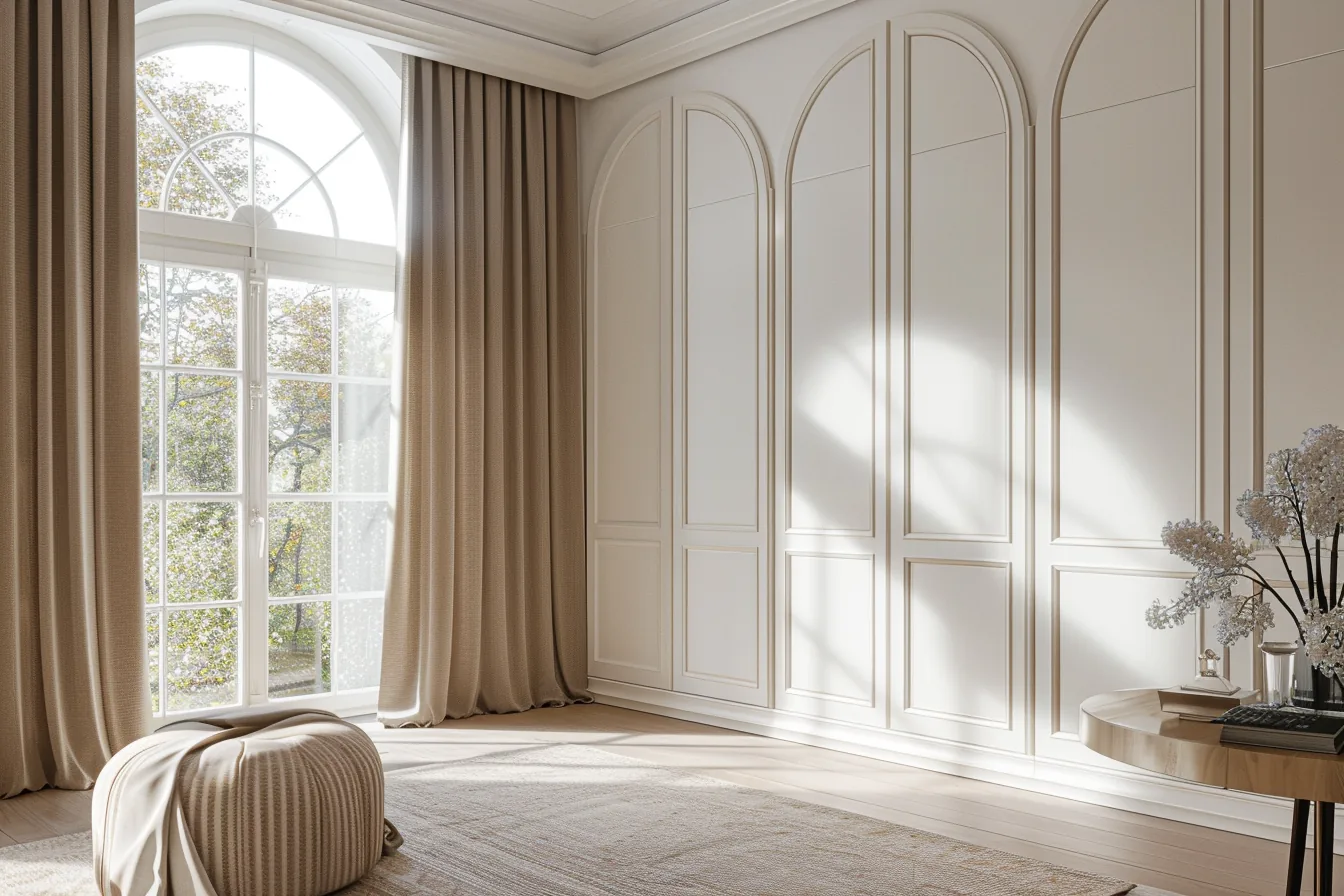
Arched Paneled Wardrobes, part of the Classic Paneled Wardrobes collection. Finish, layout and dimensions are specified per project.
Why arched doors change the quantity conversation
A flat rectangular door can be repeated across a run without anyone thinking about it. An arched door cannot. The arch radius has to agree with the door width, and the top of the arch has to sit at a height that still clears ceilings, cornices, lighting and any window head nearby. Once you accept that, the practical consequence is simple: you order arched wardrobes by opening and by wall, not by metre or by a generic unit count.
Our Arched Paneled Wardrobes are made to measure, with material and finish options and a layout tailored to the project. That flexibility is exactly why we ask for an opening schedule early — it tells us how many distinct sizes exist, and every distinct size is a separate production setup.
Step 1: Build an opening schedule before you count anything
List every wardrobe in the project as one row, and record for each:
- The room and wall it sits on, including which end of the wall it starts from.
- Finished floor-to-ceiling height at the left edge, centre and right edge — measure three points, because slabs and screeds are rarely level.
- Total run length, and whether the run turns a corner or stops into a reveal.
- The number of doors, which ones are arched, and where a drawer bank or open niche breaks the run.
- Obstructions: skirting, architraves, downlights, air grilles, switch plates, radiators, door swings.
This schedule is what we quote against. A room-by-room count of "six wardrobes" tells us nothing about how many different carcass heights or arch radii are involved, and a vague count is the fastest route to a change order after production has started.
Step 2: Group openings so you buy fewer unique sizes
Once every opening is recorded, group them. Wardrobes on the same floor, on walls of the same length and the same finished height, can share one carcass size and one door set. Repeating a size reduces setup steps, keeps panel grain and lacquer batches consistent, and makes spares meaningful — if you duplicate a size, a spare door is actually a usable spare.
Where two bedrooms are nearly identical, resist the temptation to fine-tune one of them by 50 mm. That single change creates a second unique size that will never repeat in the project. If a design change is worth making, make it across the whole group.
Step 3: Order against confirmed finished levels, not architectural drawings alone
Wardrobe dimensions depend on finished floor and finished ceiling levels. Drawings show design intent; the site shows what was actually built. Before we lock production, we need the levels that will exist when the joinery is installed — including floor build-up, screed depth, and any ceiling lining or cornice that reduces the clear height.
For arched runs this matters more than for square ones. A ceiling that comes down by a small amount can push an arch into a position where it no longer clears a door frame or a light fitting, and re-profiling doors after finishing has been applied is not something we can do cleanly on site.
A good sequence: confirm finished levels → verify openings on site or with a measured survey → issue the opening schedule → agree arch radius and door layout → release production. Reversing any two of those steps is where rework starts.
Step 4: Coordinate the products that touch the wardrobe
A wardrobe is never bought alone. The items below share a wall, a reveal or a sightline with it, and each one has to be specified against the same drawings at the same time.
| Adjacent product | What to coordinate |
|---|---|
| Interior doors and architraves | Door head height, arch style and wall build-up must match the wardrobe elevation. Where an arched doorway and an arched wardrobe share a room, agree one radius language for both before either is made — Santerson Arched French Doors are also made to measure with material and finish options. |
| Wall panelling and integrated wall systems | Panels, niches and floating shelves that run into a wardrobe wall should be drawn on the same elevation so joints land where you want them, not where the installer finds them. |
| Vanity units and bathroom countertops | Where a bedroom wall continues into an ensuite, keep timber tone, edge detail and reveal depth consistent across both. |
| Kitchen and utility cabinetry | If the same supplier is making wardrobes and kitchen cabinets, order them on one drawing set so material batches and hardware align. |
| Flooring | Decide whether the wardrobe sits on the finished floor or the subfloor. That single decision changes carcass height and skirting detail. |
| Lighting | Interior wardrobe lighting, niche lighting and downlight positions need cable routes agreed before panels are cut. |
| Bed frames and headboards | Bulkhead depths, bedside niches and door swings must clear the bed layout. |
Where a project needs wardrobes, doors, panelling and vanities to behave as one design, it is usually easier to place them with a single supplier. A full-house example on our site — the Arched Niche & Full House Custom Wall Cabinet Project — combines arched display niches, a full-height wardrobe wall, an integrated vanity and a stone bathroom countertop as one package, with site measurement, 3D rendering, manufacturing and on-site installation handled together.
Step 5: Decide the finish schedule by zone, not by room
Arched paneled doors are the visible part of the package, so the finish decision carries across the whole floor. Group your finishes deliberately:
- One door face per elevation. Mixing panel profiles on a single wall draws attention to the join between them unless that is the intended effect.
- Wood grain direction and batch. Panels cut from different batches can read differently once installed side by side. Ordering one zone at a time keeps batches together.
- Lacquer and veneer samples approved before release. Approve physical samples against the wall paint, flooring and hardware you have already chosen, not against a drawing.
If part of the project wants a classic paneled look and another part wants something plainer, keep them in separate rooms rather than splitting one room between two languages. Related collections on our site — such as shaker panel wardrobe and Classic Paneled Solid Wood Wardrobes — can sit in the same project as long as each room commits to one.
Step 6: Plan packaging, delivery sequence and storage
Quantity planning is not complete until you know how the goods arrive and where they wait. Wardrobe panels are long, and arched doors are awkward to stack. Tell us early:
- Which floors or units need to be installed first, so we pack and label by room rather than by production batch.
- Whether the site can receive a full container at once or needs staged deliveries.
- Where panels will be stored — flat, dry, off the ground and away from trades working wet.
Our service covers interior design services including space planning and product specification, manufacturing and quality control, project management and site coordination, then installation and handover. Freight is arranged by sea, air or rail with customs paperwork and door-to-door delivery, so the delivery sequence agreed at order stage is what we build into packing.
Step 7: Hold a spare schedule you can actually use
Order spares only for sizes that repeat. For each duplicated wardrobe size, consider one spare door panel and any hardware that is not stocked locally. For one-off arched openings, a spare door is rarely worth the cost — instead, keep the approved drawings, arch radius and finish reference so a replacement can be remade to the same specification years later.
A practical quantity checklist
- Opening schedule complete: every wardrobe, every wall, three height points each.
- Finished floor and ceiling levels confirmed in writing.
- Unique sizes minimised by grouping; changes applied across a whole group.
- Arch radius, door count and drawer or niche breaks fixed per elevation.
- Adjacent products — doors, panelling, vanities, kitchen cabinets, flooring, lighting — drawn against the same elevations.
- Finish samples approved against real wall paint, flooring and hardware.
- Delivery sequence, packing labels and storage area agreed before production release.
- Spare policy set: spares for repeated sizes, drawings retained for one-offs.
Dimensions, materials, finishes and specifications are confirmed for each project individually. The steps above describe how we prepare an order; they are not a substitute for a measured survey of your own site.
SANTERSON is a China-based manufacturer and one-stop supplier of furniture and building materials, working on villa, hospitality and office projects. Send us your opening schedule, drawings or a room list, and we will return a wardrobe quantity plan, a coordinated product specification and a quotation.
As a one-stop furniture and building materials supplier, we can take the wardrobe package from opening schedule through installation. Contact PHILLIP — Phone / WhatsApp +86-13928214007, email santerson@qq.com.