
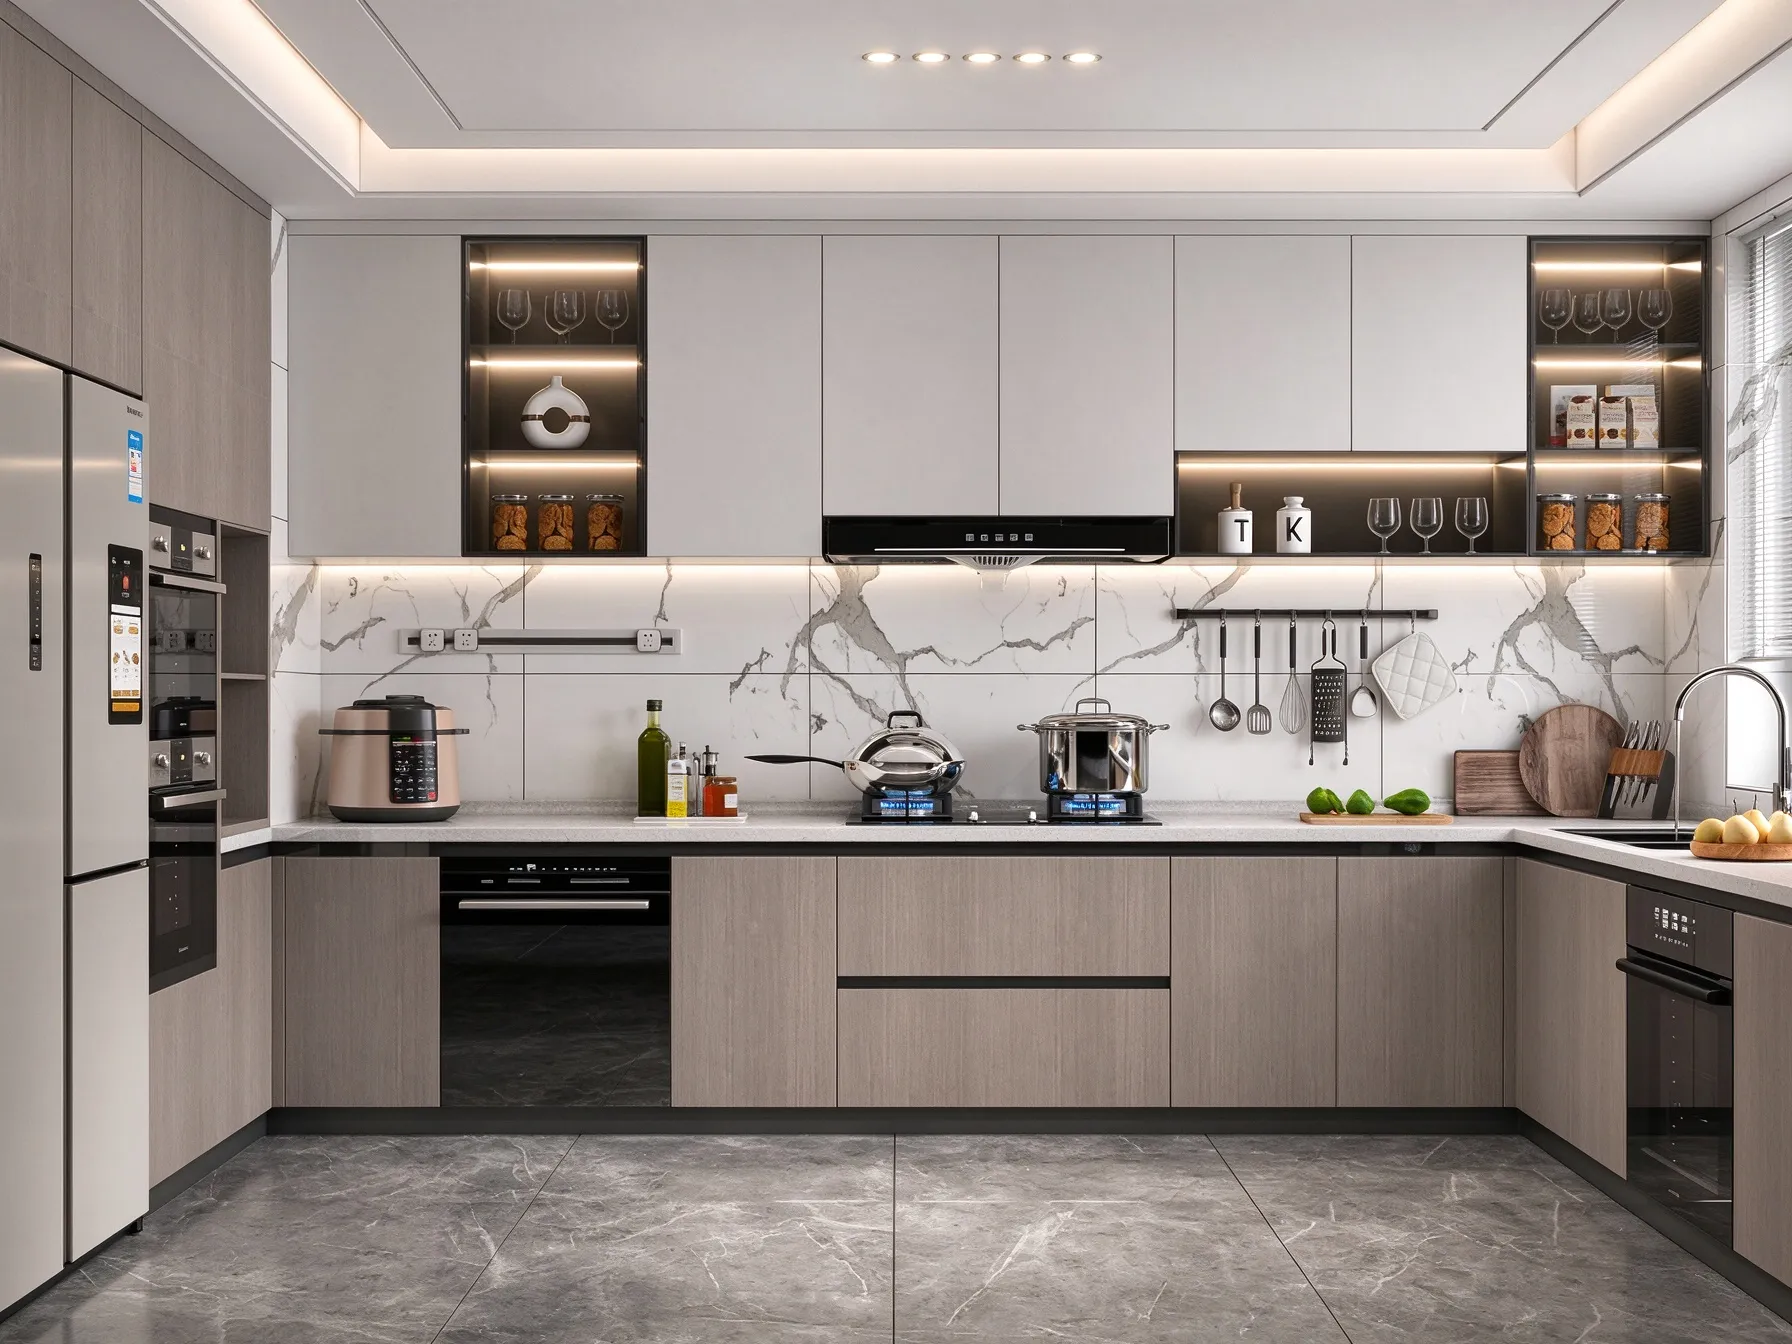
A two-tone kitchen that pairs natural wood grain with clean white panels looks simple on a render and complicated on a purchase order. The look carries across a whole run of units, so the decisions behind it have to be settled unit by unit before production starts. If you are specifying this two tone wood & white modern kitchen cabinet set for a villa, an apartment block or a boutique hotel fit-out, the questions below are the ones worth putting in front of your supplier early, and the answers are what protect both the appearance and the budget.
Why the Two-Tone Combination Is More Sensitive Than a Single-Finish Kitchen
With one door colour across the whole kitchen, a small deviation in tone is easy to absorb. With two, the eye reads them against each other: the wood grain sets the warm note and the white sets the clean one, and if either drifts the whole elevation changes. That is why buyers should treat the pairing as a specification item rather than a decoration choice.
The same logic applies to proportion. A run where tall units carry the wood grain and the perimeter carries matte white reads very differently from one where the grain sits on the base and the white on the wall cabinets. Send your supplier the elevation with the colour split marked, not just a mood image, because the split drives both panel ordering quantities and where the more expensive finish ends up in the bill.
Panel Material and Surface Finish: Decide These First
SANTERSON supplies this style of cabinetry fully customised, and material plus surface finish are the first two items to lock down. The same wood-and-white scheme can be built in several panel families, each with its own look, sheen and maintenance behaviour:
| Panel family | What it gives the two-tone scheme | Best suited to |
|---|---|---|
| Wood veneer | Genuine grain figure with depth; matte or high gloss options | Villas and boutique hotels where the wood side is the feature |
| Melamine | Consistent wood-grain print and solid colour, practical wear resistance | Apartment repeats and high-traffic family kitchens |
| Acrylic | Deep, uniform colour with a smooth surface, in matte or gloss | Sharp modern whites and bold contrast schemes |
| Lacquer / PVC wrapped doors | Painted or film-wrapped surfaces, including shaker and routed profiles | Schemes that need profiled doors rather than flat slabs |
Ask for a physical sample of both sides of the pairing, in the finish you intend to order, not just a colour code on a drawing. Grain direction, sheen level and how the white sits next to the wood under your own lighting are all things a sample answers and a specification sheet does not.
Layout, Dimensions and Internal Storage
Made-to-measure sizing is standard on this cabinetry, so use it deliberately rather than defaulting to a catalogue grid. The items to agree:
- Cabinet dimensions per elevation. Overall run lengths, unit widths, carcass heights and depths, and the working triangle as you intend to build it.
- Internal partitions by zone. Deep pan drawers for pots, cutlery dividers in the prep run, adjustable shelving in the tall units, and a dedicated place for dry storage.
- Appliance positions. The reference design reserves space for a built-in refrigerator and an oven. Send appliance model numbers before carcass sizes are fixed, so ventilation gaps and door openings are designed in rather than adjusted on site.
- Tall and corner units. Decide early whether corners are Lazy Susan, carousel or drawer stacks; the hardware choice changes the carcass, not just the fitting.
Hardware is part of the specification too. Hinges, drawer slide rails, support legs and connecting brackets can be supplied with the cabinetry, and on a project order it is simpler to have them matched to the panels from the start than sourced locally later. If soft-close fittings matter to your end users, say so when the hardware list is drafted.
Handleless or Handle, and What That Decision Affects
The two-tone scheme works both ways, but each has consequences worth pricing at the enquiry stage. A handleless minimalist kitchen cabinet arrangement removes protruding hardware for continuous surfaces and typically relies on touch-to-open or profile-pull mechanisms, with soft-close fittings to reduce noise in apartments and hotel rooms. A handled door is cheaper to specify and easier for some users to grip.
If you want the seamless look but need it tested before committing a whole project, ask for one handleless run as a sample or first-apartment unit. The feel of an integrated pull is something buyers judge by hand, and it is far less costly to change on one unit than across twenty.
Glass Display Cabinets and Integrated Lighting
The reference design places glass cabinets with built-in warm LED strips either side of the tall run, used to display tableware and storage containers. Three details need settling before order:
- Glass type. Clear, frosted or smoked changes how much of the contents you see, and smoked glass reads darker against white panels than most buyers expect from a sample card.
- Led strip specification. Colour temperature, whether the strip is concealed in a channel, and where its power supply sits so it stays accessible after installation.
- Shelving inside the glass. Glass shelves with lighting, or solid shelves matching the carcass, give very different results once lit.
Confirm how the lighting is switched and whether it ties into the kitchen circuit or a separate feed. This is an electrical coordination item that has to appear on the drawings your electrician works from, not be discovered at first fix.
Worktops, Backsplashes and Surrounding Finishes
The two-tone scheme is usually completed by a stone backsplash in a marble or veined pattern. Because the wood side already carries pattern, the splash needs to be chosen alongside it rather than after it. Send the supplier your selected worktop and splash samples together with the door samples, so the three surfaces are reviewed as one set.
Where the kitchen opens into a living space, extend the conversation to the finishes that meet it. SANTERSON also supplies interior fixtures and wall, panel and flooring products for the same project, so matching the wood tone in cabinetry to the flooring and door ranges avoids the near-miss tones that make a scheme look assembled rather than designed.
How Project Buyers Should Sequence the Conversation
For multi-unit work, customisation only pays if it is fixed before production. The sequence that keeps cost and lead time predictable:
- Brief and drawings. Elevations with the colour split marked, appliance schedule and a room dimension survey.
- Sample approval. Door samples in both finishes, glass sample, hardware sample, splash and worktop samples.
- Quotation and detail confirmation. Unit-by-unit breakdown, hardware list, lighting specification and any variations between unit types.
- Production and quality control. Agree the inspection points you want before panels are machined.
- Logistics and delivery. Packaging, container loading plan and delivery address per site.
- Installation and handover. Sequence of cabinet, appliance and electrical connection, plus the snag list process.
SANTERSON works as a turnkey furniture and building materials supplier, covering design coordination, custom and OEM production, door-to-door delivery and installation support, which means the kitchen can be specified in one package with the joinery, doors and other fixtures for the same building. Published project references include villa and apartment work in Willoughby, Perth, North Turramurra, Melbourne and Sydney, so this style of two-tone cabinetry is being specified on Australian residential projects rather than only shown in a showroom.
A Practical Checklist for Your Enquiry
Send these with your first enquiry and the quotation comes back usable
- Marked-up elevations showing which units carry wood grain and which carry white
- Room survey dimensions, ceiling heights and any obstructions
- Appliance schedule with model numbers for built-in refrigerator, oven and others
- Preferred panel family and sheen level for each of the two finishes
- Glass type and lighting preference for display cabinets
- Handleless or handled doors, and soft-close requirement
- Worktop and backsplash samples or product references
- Quantity per unit type, delivery address and site access notes
Confirm the final dimensions, selected finishes and hardware for each project in writing before production is released. Where a specification sheet and a rendered image disagree, the written confirmation governs.
Questions Buyers Ask About This Two-Tone Kitchen
Can the wood tone be matched to flooring or doors already chosen for the project?
Send the existing finish sample or product reference with your enquiry. Veneer and melamine grain options can be specified to sit with a selected floor or door tone, but the match should be approved on a physical sample before production.
Is matte or gloss better for the white side?
Matte white keeps fingerprints and light reflections quieter in busy kitchens and reads softer against grain. Gloss white reflects more light and suits darker galley layouts, but shows marks more readily on door faces that get daily handling.
Can the same design be repeated across several apartment units with small changes?
Yes. Unit-type variations are normal in project work. Keep one approved reference unit per type, and record each variation as a named variant on the quotation so production and delivery are tracked against the correct layout.
What happens if the white panels and the splash arrive from different suppliers?
Review both samples together before ordering, since a cool white door next to a warm veined splash can make the cabinetry look off-white. Specifying cabinetry and surrounding finishes through one supplier keeps that comparison inside one scope.
Next Step
If you are specifying two-tone wood and white cabinetry for a villa, apartment or hospitality project, start with the elevations and the appliance schedule, then work through panel material, internal storage, glass and lighting as one specification. That single pass is what turns an attractive drawing into a kitchen that installs cleanly and reads the same on site as it did on paper.