
A Modern Splash Mirror Wall Lamp looks very different in a render, on a phone screen and mounted on a finished bathroom wall. The sculptural splash silhouette, the mirror surface and the way the warm LED reads against tile are exactly the details that get argued about on site if nobody sees a physical sample first. For hotel, villa and apartment fit-outs, a signed-off finish sample is the cheapest protection you can buy before production runs. Here is the review sequence we recommend buyers follow.
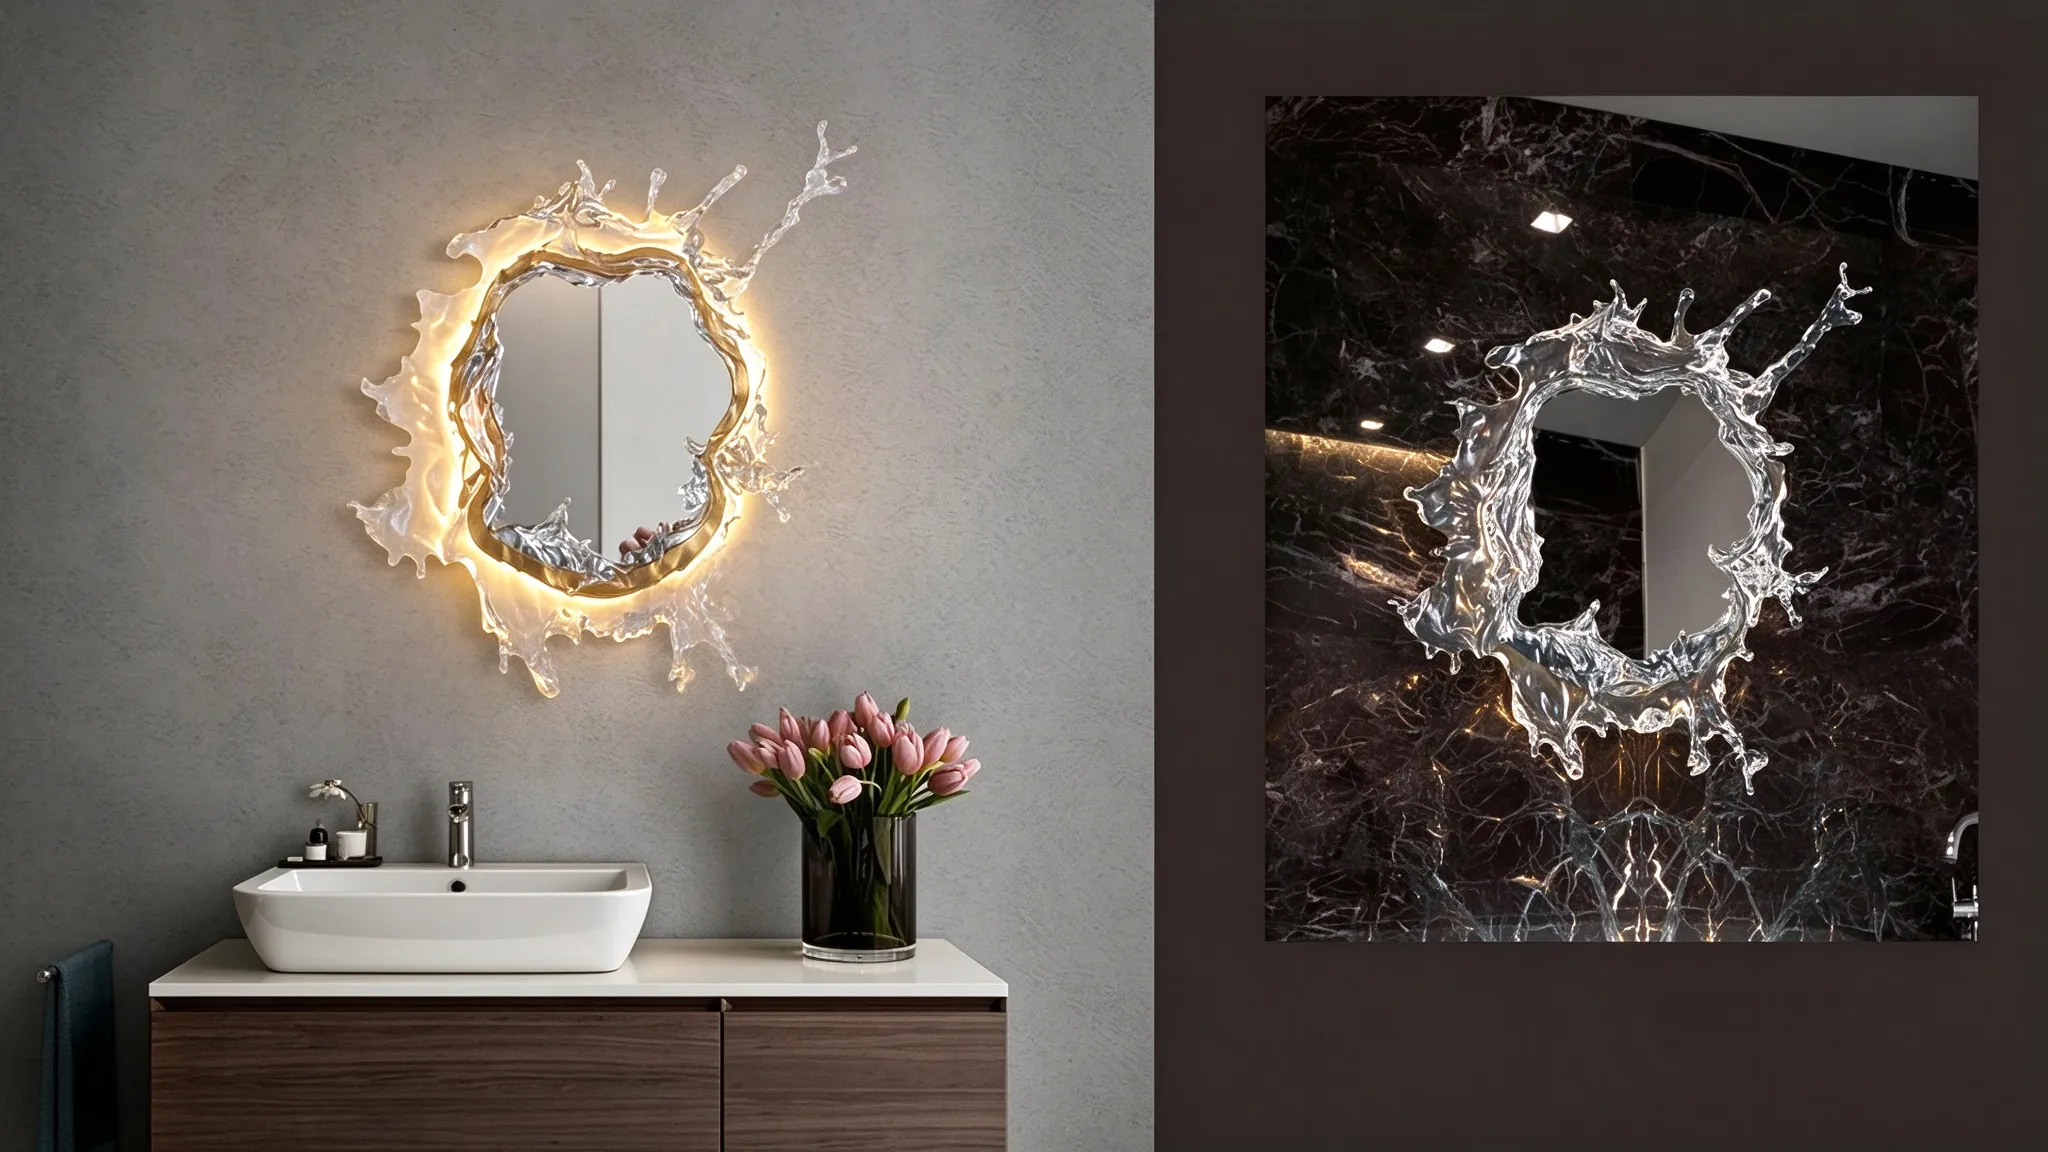
Reference product image for the splash mirror wall lamp reviewed in this article.
Why a Splash Mirror Sconce Needs a Physical Sample
This fixture combines three materials that behave differently under bathroom lighting: a central mirror, a transparent splash-like surround and an integrated warm light source. Photographs compress those differences. In person you can judge whether the transparent frame reads as crisp or cloudy, whether the mirror edge is polished cleanly where it meets the surround, and whether the glow spreads evenly across the splash shape instead of pooling at one point.
Bathroom vanity walls also amplify mistakes. Tile, glass and stone all reflect, so a finish that looks neutral in a warehouse can pick up a strong colour cast next to a beige marble wall or a dark grey tile field. A sample lets you hold the piece against your actual finish schedule before any order is committed.
Step 1 — Lock the Specification Sheet Before Requesting Samples
Sample review only works if the sample matches what will be produced. Ask for a written specification sheet covering each of the following, and keep it attached to the signed sample:
| Item to confirm | Why it matters at sample stage |
|---|---|
| Overall diameter and projection from the wall | Determines clearance beside mirrors, vanity cabinets and shower glass |
| Mirror type and edge treatment | Bevelled, polished or raw edges change how the splash shape reads up close |
| Transparent surround material and clarity | Tint, cloudiness and surface texture are only visible in daylight and under room lighting |
| Light source colour appearance (warm / neutral) | Sets how skin tones look at the vanity and how the splash frame glows |
| Mounting plate position and backplate finish | Affects whether the fixture sits flat on a tiled surface and how the cable is concealed |
| Dimming compatibility with the site's switch or driver | Flicker and drop-out only appear when the sample is wired to your control gear |
| Bathroom zone suitability and enclosure rating | Determines how close to the basin or shower the fixture may be installed |
Light output, power draw, colour temperature and enclosure rating are not published as fixed values for this lamp, because the fixture is made to each project's specification. Record them in writing per order rather than assuming a figure from a similar fitting; our team confirms these numbers against each project specification before production.
Step 2 — Inspect the Sample Under Three Lighting Conditions
Do not sign off under a single light source. Test the sample in:
- Daylight, fixture switched off. Check the mirror for distortion, wave or discolouration, and check the transparent surround for scratches, bubbles or yellowing at the edges.
- Room lighting on, fixture switched off. Look at how the frame reflects the surrounding finishes. This is where an unwanted colour cast becomes obvious.
- Fixture switched on, room lighting off and on. Watch the light line along the splash shape for uneven brightness, visible hot spots, or a seam where the light escapes from the housing.
Mount the sample temporarily on a board finished with your actual tile or panel, at the intended height above the vanity. A hand-held inspection misses how the fixture behaves once it is flush against a hard surface.
Step 3 — Check Build Details That Decide Service Life
Bathrooms are humid and fixtures get cleaned regularly. Turn the sample over and inspect:
- Sealant lines around the mirror and surround — continuous, neat, no gaps.
- Backplate and fixing hardware thickness, and whether the fittings provided suit a tiled wall.
- Cable entry and strain relief — is the wire protected where it meets the housing?
- Driver or connection box access — can an electrician reach it without removing the decorative body?
- Finish adhesion on any metal parts — ask for the coating method in writing if the sample includes a coloured frame.
Mark any acceptable deviations directly on the sample card with the date and approver's name. That signed card becomes the reference for incoming inspection when the production batch arrives, which matters most on multi-unit projects where dozens of sconces are installed across guest rooms or apartments.
Step 4 — Coordinate the Sconce With the Rest of the Bathroom Package
Wall lamps rarely fail on their own; they fail as part of a package. Before production, lay the approved sample against the other items in the same room: vanity lighting over the mirror, LED mirror cabinet if one is used, the basin and countertop, tapware and cabinetry fronts. Check that metal tones match, that the two light sources do not fight each other at the mirror, and that mounting heights are consistent across rooms.
Where a project needs matching wall sconces in bedrooms, corridors or lounge areas, review those samples at the same time. One approval trip covering all lighting items is faster than approving each category separately.
Because we work as a one-stop furniture and building materials supplier, the same sample review covers bathroom ceramics, cabinetry, wall panels and flooring in one submission. For hospitality schemes, that coordination is also the reason to include bathroom fixtures for hotel projects in the same approval round.
Step 5 — Set the Production and Acceptance Rules With the Signed Sample
Once the sample is approved, convert it into rules that survive the production run:
- State clearly which attributes are fixed by the sample (mirror edge, surround clarity, light appearance) and which fall within a defined tolerance band.
- Agree who inspects against the sample and at what stage — before packing, on delivery to site, or both.
- Keep one sealed reference sample on site with the installation pack so fitters install against the same expectation as the buyer.
- Photograph the approved sample from the front, side and with the light on, and attach those photos to the order file.
If changes are requested after approval — a different surround tint, a revised size, a custom mounting arrangement — treat them as a new sample cycle rather than a verbal note. Where bespoke sizing or finishes are needed, our custom and OEM service covers prototyping before the full run.
Common Sample-Stage Problems We See, and How to Avoid Them
| Problem found at sample stage | Usual cause | Preventive action |
|---|---|---|
| Mirror shows a green tint at the cut edge | Standard mirror stock rather than low-iron glass | Specify the mirror type on the sheet before sampling |
| Splash frame looks cloudy or has bubbles | Casting or moulding variation in the transparent part | Approve a tolerance card for clarity and inclusions |
| Light appears cooler than expected | Different LED batch or driver pairing | Fix the light source series in writing and test with site drivers |
| Fixture sits proud of a tiled wall | Backplate depth not matched to tile thickness | Send your tile build-up detail with the sample request |
| Flicker when dimmed | Driver and control gear mismatch | Test the sample with the actual switch or dimming system |
A Short Pre-Production Checklist
- Specification sheet signed, including dimensions, light appearance and enclosure rating for the intended bathroom zone.
- Sample inspected in daylight, with room lighting on, and with the fixture lit.
- Sample mounted at real height against a board finished with the project's tile or panel.
- Mirror edge, surround clarity and light line approved, with tolerances written down.
- Fixing method confirmed for tiled walls; cable entry and driver access checked.
- Sconce cross-checked against vanity lighting, mirror cabinets and tapware in the same room.
- Sealed reference sample retained and photographed for incoming inspection.