
A blue grey kitchen scheme rarely fails on the sample board. It fails on site — when a wall unit clears a window reveal by 8 mm, when an integrated oven sits 30 mm off the drawing dimension, or when two shades of matte grey meet under different light. If you are specifying modern blue grey minimalist kitchen cabinets for a villa, apartment or hotel room block, the coordination work happens before production: on drawings, in appliance schedules and in the actual room. This guide sets out what to fix at each stage so the cabinetry you approve is the cabinetry that installs.
Why Minimalist Blue Grey Cabinetry Exposes Every Measurement Error
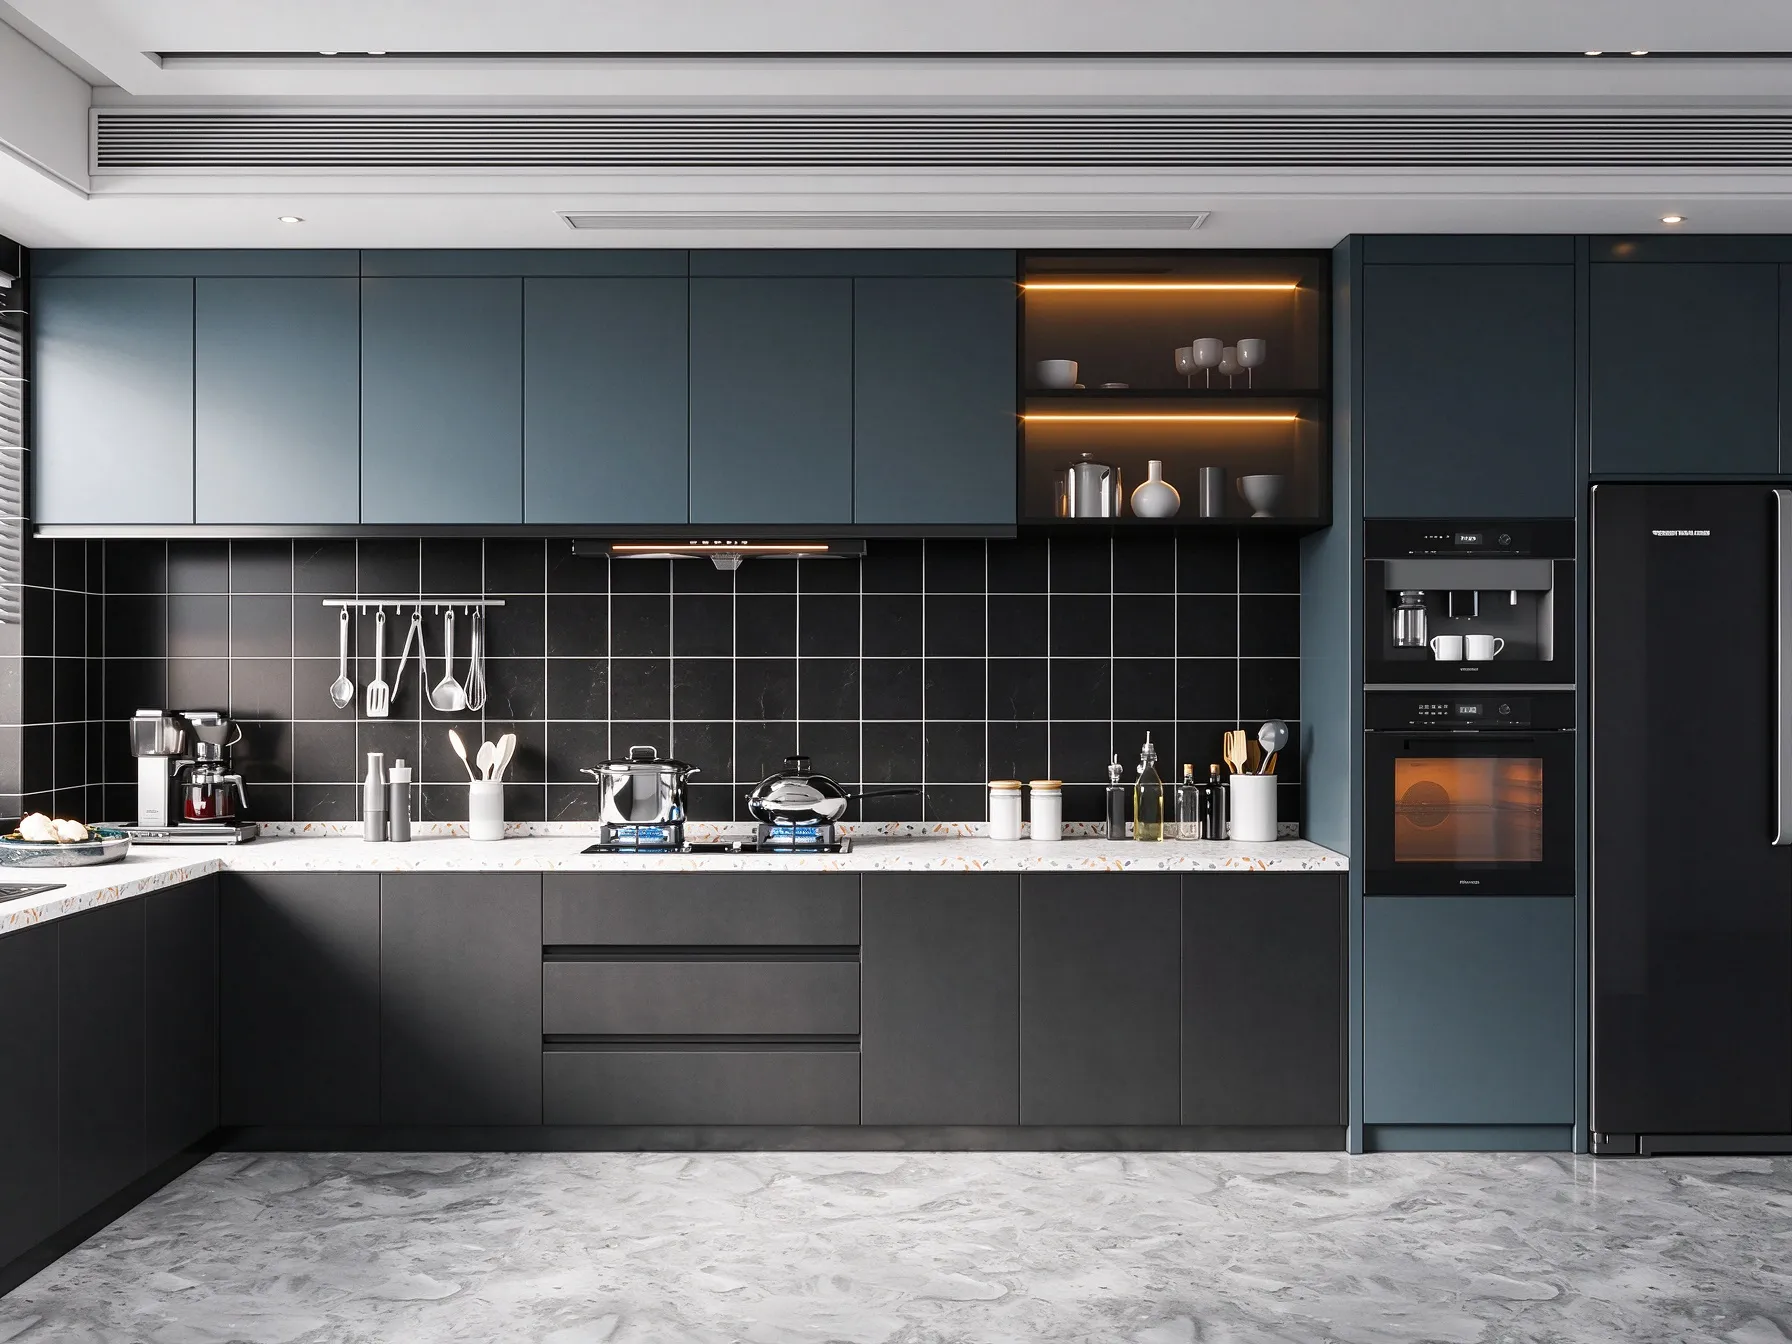
The design language of this category is unforgiving by nature. Flat doors with no mouldings, hidden handles or touch-to-open fronts, and a two-tone palette of deep blue against dark grey leave no visual break to hide an out-of-plumb wall or an uneven reveal. Three characteristics drive the coordination effort:
- Continuous flat planes. Handleless fronts read as one surface, so door gaps, shadow lines and scribe heights become visible design features rather than details.
- Two-tone contrast. Where a blue panel meets a grey panel, the joint is intentional. Setting-out must place that change at a real corner or appliance edge, not wherever the run happens to end.
- Integrated appliances and lit display units. This cabinet type reserves space for ovens, coffee machines and refrigerators, and typically includes a glass open cabinet with built-in LED lighting. Each of those is a fixed dimension you cannot adjust on site.
The practical consequence: the tolerance you allow belongs on paper, in the factory, where it can be corrected — not on the finished wall.
Stage 1 — Reading Design Drawings Against What the Cabinetry Can Actually Do
Before any dimension is confirmed, align the designer's intent with the manufacturer's build options. Custom cabinetry is made to order — layout, dimensions, door style, panel colour and surface finish are all open — so drawings should be treated as a starting brief, not a fixed specification.
Send the manufacturer what they need to price and build it properly:
- Layout plans for every kitchen, including base units, wall units and pantry or tall units.
- Appliance schedule with make, model and cut-out dimensions — oven, hob, extractor, refrigerator, dishwasher, coffee machine.
- Countertop material and thickness, plus the upstand or splashback treatment.
- Interior fitting requirements: drawer stacks, pull-out corners, hampers, waste sorting, wine storage.
- Lighting intent for glass display cabinets and internal cabinet lighting, including switch or sensor location.
Ask the manufacturer to mark where their standard module sizes conflict with your grid. A drawer-focused modular wardrobe is easy to adjust; a run of flat doors sized to 100 mm increments is not. Get that feedback while the drawing is still editable.
Stage 2 — Capturing Site Requirements Before Production Starts
Drawings describe a theoretical room. Site verification describes the room you have. For cabinetry with flat panels and integrated appliances, these are the checks that prevent rework:
| Item to verify on site | Why it decides the cabinet build |
|---|---|
| Finished floor levels and wall alignment across the whole run | Determines scribe heights, plinth detailing and whether a levelled base line is achievable without visible packing. |
| Positions of soil stacks, risers, sockets and switches | Drives cut-out locations in carcases and the position of appliance housings; drilling finished panels on site is not acceptable on matte lacquer or acrylic fronts. |
| Window reveals, door swings and ceiling heights | Sets the terminal height of wall units and whether a tall unit can sit next to an opening. |
| Appliance cut-outs against the model actually procured | Integrated appliances must match reserved housings; a substituted model changes the housing, not just the appliance. |
| Light conditions on each wall face | Matte and high-gloss surfaces read differently by orientation; blue grey shifts noticeably between north light and warm artificial light. |
| Access route from the delivery point to the kitchen | Assembled tall units and long counter runs must fit lifts, stairwells and corridor turns, or they need to be split and joined on site. |
Record the verified dimensions as a marked-up drawing set and get written confirmation before production is released. That single step removes most site disputes.
Stage 3 — Locking Colour, Finish and Hardware in Writing
Colour names are not specifications. "Blue grey" covers a wide range, and matte finishes behave differently from high gloss under the same lamp. For this scheme, confirm:
- Physical samples of both panel colours, in the actual finish — matte flat panel, not a printed card.
- The pairing rule: which units are deep blue and which are dark grey, drawn on the plan rather than described in an email.
- Edge and reverse face treatment, so visible cabinet ends match the front.
- Hardware set: hinges, drawer slide rails, soft-close fittings, support legs and connecting brackets. Specify them with the cabinetry instead of sourcing separately, so load ratings and door weights are matched by one supplier.
- Glass and lighting specification for display cabinets: glass type, frame finish and LED colour temperature.
Practical rule
Any element that will be seen from across the room — panel colour, door joint, glass cabinet frame — should be approved as a physical sample and referenced by code on the production drawing. Anything described only in words will be argued about later.
Stage 4 — Coordinating Cabinetry with the Rest of the Fit-Out
A kitchen does not install alone. Where cabinetry meets flooring, wall finishes and lighting, sequencing matters more than any single product choice.
- Flooring. If engineered wood flooring or tile is laid after the cabinets, the plinth height and door bottom clearance must be set to the finished level, not the slab.
- Wall panels and splashbacks. Where a cabinet abuts a decorative wall panel or stone surface, agree who trims the gap and by how much.
- Lighting. Under-cabinet and internal lighting needs a cable route decided at carcase stage; retrofitting into a finished panel leaves visible fixes.
- Appliances and services. Confirm who supplies and connects each appliance, and who is responsible for testing before handover.
Sourcing cabinetry alongside adjacent finishes from one supplier simplifies this. Custom built-in kitchen cabinets supplied as interior fixtures come with matching hardware and a coordinated layout, which removes the interface arguments between separate cabinet, joinery and hardware vendors.
Stage 5 — Production Sign-Off, Delivery and Installation
For project orders, the handover chain is worth as much attention as the design. A turnkey workflow — consultation, design and planning, production, logistics, installation and after-sales — keeps responsibility with one party instead of spreading it across forwarders, joinery workshops and local fitters.
- Production drawings signed off against the verified site dimensions, not the tender drawings.
- Packing list keyed to room and unit number, so crates go to the right floor instead of being opened at random.
- Delivery terms and duties confirmed in writing before dispatch, including who handles customs clearance at the destination.
- A snag list closed out on site: door alignment, soft-close operation, lighting function, panel condition.
- Spare-panel arrangement for units exposed to heavy use in hotel or rental kitchens.
Ask the supplier what their installation team and after-sales process actually cover for your destination country before you rely on it. Response times, warranty scope and installer availability vary by project and should be confirmed case by case rather than assumed from marketing material.
A Short Pre-Production Checklist
- Layout, appliance schedule and lighting intent issued to the manufacturer together.
- Site dimensions verified against finished floor levels and recorded on marked-up drawings.
- Both panel colours approved as physical samples in the specified finish.
- Hardware, glass and LED specification written into the order.
- Interface responsibilities with flooring, wall finishes and lighting agreed in writing.
- Production drawings signed off after site verification, before manufacture is released.
If you are specifying this palette for a renovation or a room block, start from the product page and send your drawings with the appliance schedule attached. Compare related schemes in the same family — custom minimalist kitchen cabinets for home renovation and handleless minimalist kitchen cabinets — to see how handle detail and door construction change the setting-out before you commit.
Send drawings, get a buildable proposal
SANTERSON manufactures and supplies custom kitchen cabinetry and interior fixtures for villa, apartment and hotel projects, with design support, custom and OEM production, door-to-door logistics and installation support.
Contact: PHILLIP | Phone / WhatsApp: +86-13928214007 | Email: santerson@qq.com