
A sculptural ceiling fixture is one of the few finishes that every guest, resident and contractor notices in a dining room — and one of the easiest to get wrong when the order list is written late. This guide walks through how project buyers count up Modern Wavy Ceiling Light, Sculptural LED Flush Mount for Dining Room & Bedroom, and how to coordinate that fixture with the rest of the lighting, ceiling and joinery package so nothing arrives out of sequence.
What the Fixture Is, Before You Count It
The Modern Wavy Ceiling Light is a flush-mounted fixture with an undulating wave-shaped body, a mesh-like metal surface and integrated LED strips. The published product description positions it as a soft ambient light and a visual centrepiece for dining rooms, bedrooms, lobbies and contemporary interiors. Two consequences follow directly from that form, and both affect quantities:
- It is decorative first. A fixture whose value is its silhouette cannot be treated like a generic downlight that disappears into the ceiling.
- It sits close to the structural slab, so it competes visually with ceiling finishes, coving, beams and any exposed services. The ceiling finish has to be resolved before the fixture count is locked.
The product page does not publish wattage, lumen output, colour temperature, body length or mounting details. Those figures need to be confirmed with the factory for each project before they go into a specification sheet or a purchase order — do not carry them across from a similar fixture in another range.
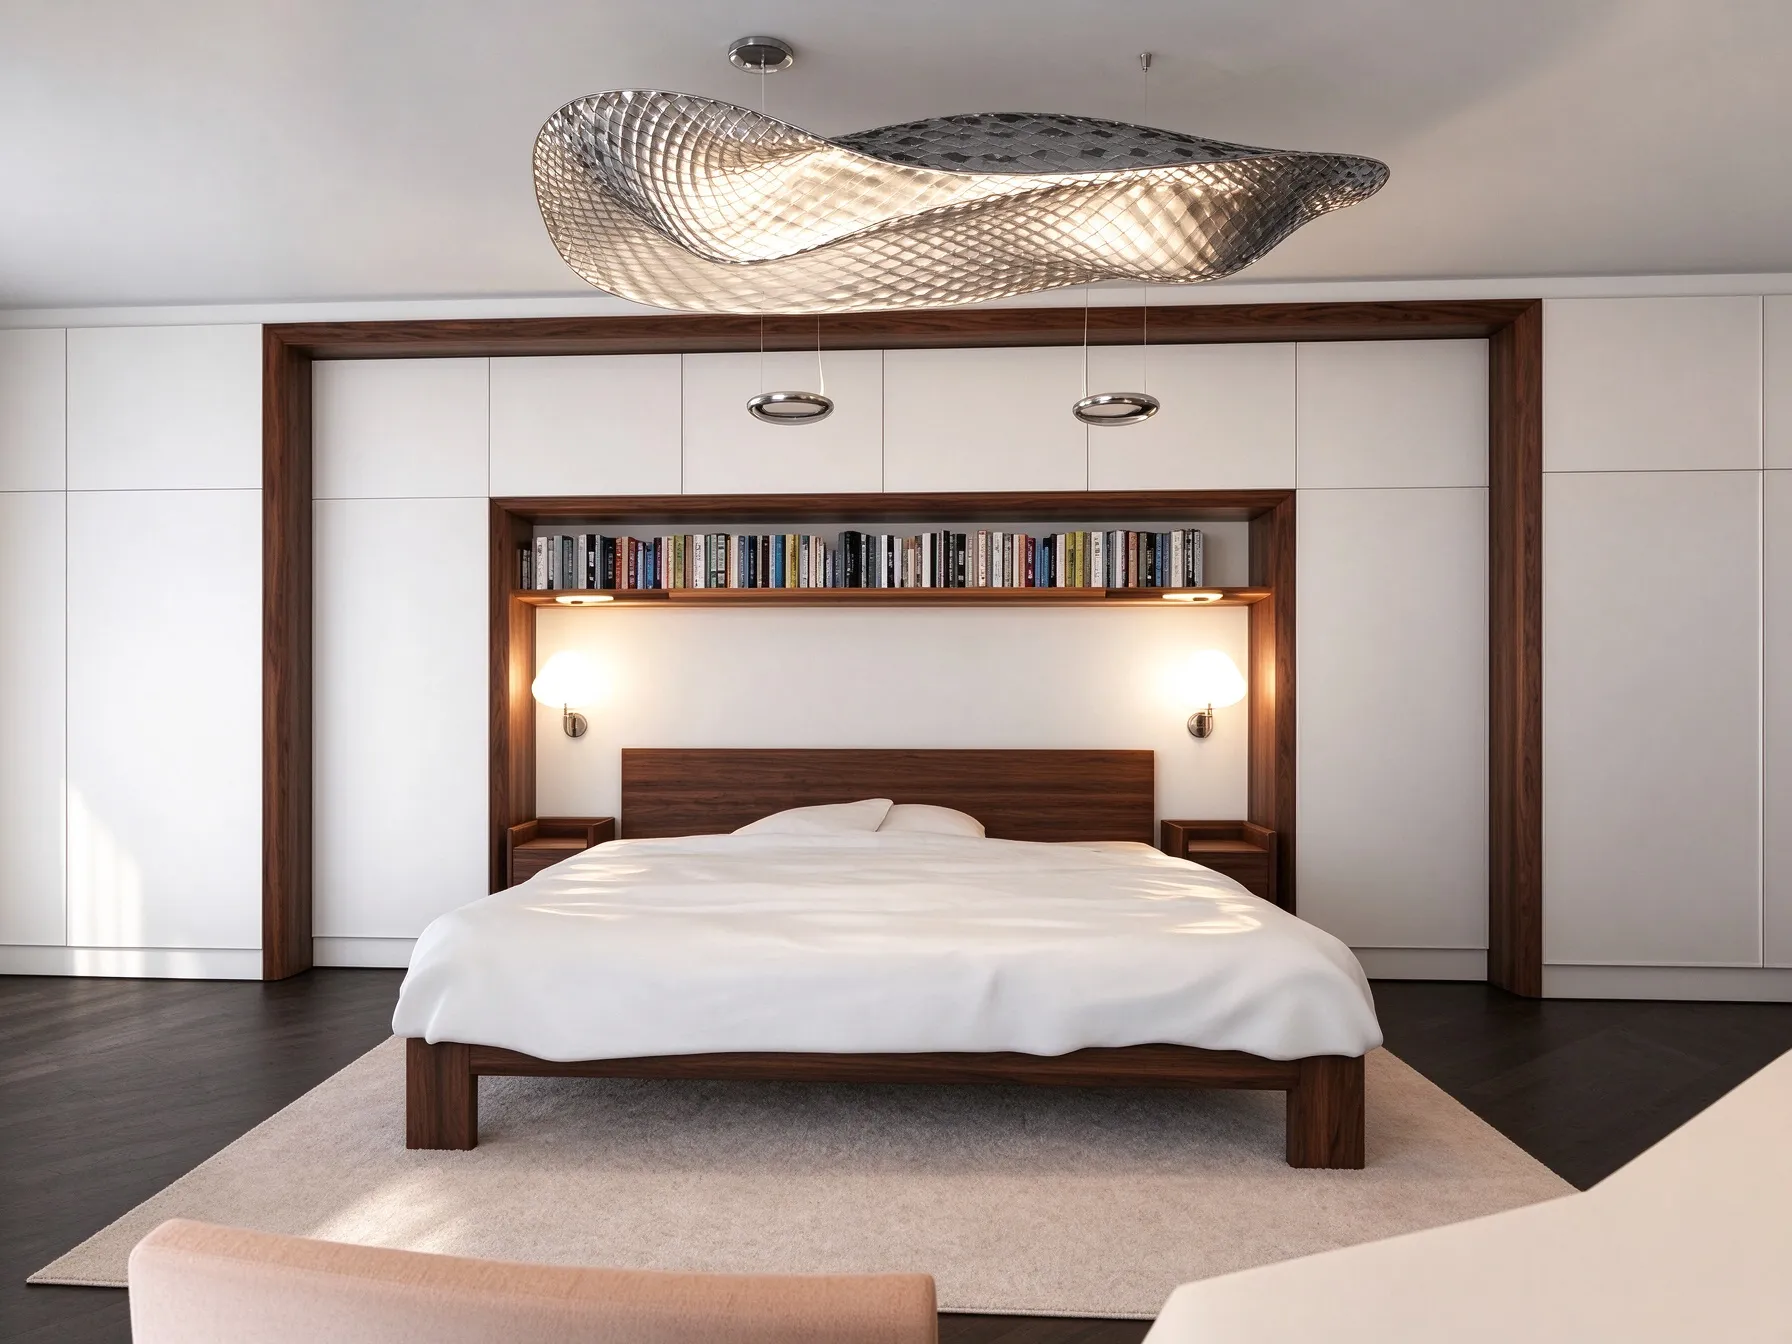
Wave-form body with integrated LED strips — the form is the reason it is specified, so protect it during installation.
Step 1: Count by Room Type, Not by Floor Area
Estimating lighting quantities from floor area tends to over-order sculptural pieces and under-order ambient sources. A room-by-room schedule built in this order holds up on villa and hotel fit-outs:
- Dining rooms. One centrepiece per table setting. A single dining table takes one fixture, positioned over the table centre rather than the room centre — so the ceiling opening is set out from the furniture plan, not the architectural grid.
- Bedrooms. Typically one fixture per bedroom in villa work, or two where a suite has a separate dressing area. Bedrooms usually need less sculptural presence than the dining room, so this piece often goes into master suites only, with a lower-profile flush mount used elsewhere.
- Lobbies and circulation routes. Repeat the fixture at regular centres along the route, counted off the reflected ceiling plan. Spacing is a design decision — agree it on a mock-up before you multiply it across the building.
- Common rooms and secondary spaces. Decide room by room whether a sculptural piece earns its place or whether a slim ambient fixture is the better spend.
Step 2: Decide Where Else in the Project This Range Repeats
Coordination becomes cheap when one family of forms runs through several rooms, and expensive when every room has a different designer fixture with its own mounting detail. Four related flush mounts can be mixed deliberately:
| Fixture | Form on the ceiling | Where it usually goes in a package |
|---|---|---|
| Modern Wavy Ceiling Light | Undulating wave body, mesh metal surface, integrated LED strips | Dining rooms, master bedrooms, lobby feature bays |
| Modern Metal Ring Ceiling Light | Polished metal circular frame, black central structure, LED strip lighting | Living rooms, studies and lobbies where a ring reads better than a wave |
| Modern Dome Ceiling Light with Wood Grain Interior | Rounded semi-circular shade, warm wood-grain inner reflector | Bedrooms and dining areas that need warmth against timber joinery |
| Modern Ultra-Flush LED Ceiling Light | Clean round or square panel, slim frame, even illumination | Corridors, children's rooms and secondary bedrooms — the quiet filler |
A practical rule for a villa or hotel package: one sculptural form used repeatedly beats three sculptural forms used once each. Repetition gives you a single mounting detail, one set of ceiling openings to coordinate, and one replacement item to keep on file.
Step 3: Coordinate the Light with the Ceiling Finish It Mounts To
Flush mounts are fixed to the slab or to a solid substrate behind the ceiling finish. That creates three coordination points that belong in the same drawing review as the lighting schedule:
- Ceiling system and fixing detail. Where the project uses metal ceiling systems — for example aluminium strip ceiling or suspended aluminium ceiling tiles — the fixture cannot be fixed to the tile or baffle. Blocking, a backing plate or a local solid substrate has to be designed in and shown on the reflected ceiling plan.
- Set-out against the finish grid. A wave-form fixture placed off-grid against a linear ceiling reads as an error even when it is dimensionally correct. Fix the set-out before the ceiling contractor templates their runs.
- Services above the fixture. Sprinkler heads, ductwork and curtain-track pockets compete for the same zone. Resolve them in one coordinated ceiling review rather than sequentially by trade.
Where the wall beside the dining table is being finished at the same time, schedule the wall lights with the ceiling package — wall sconces and vanity lighting usually come from the same order, and combining them avoids two separate electrical first-fix stages.
Step 4: Coordinate with Joinery and Furniture, Not Just the Ceiling Plan
The dining fixture is set out from the table, and that table sits in a room also receiving cabinetry and wall panelling. Buyers who order lighting before the joinery layout is frozen end up re-cutting ceiling openings on site.
- Freeze the furniture plan — table position, table length, seating count — before you dimension the fixture set-out.
- Check the fixture against any tall cabinetry or wall panel system that rises close to the ceiling; a wave body needs clear sightlines, not partial occlusion behind a cabinet end panel.
- Where bedrooms include joinery lighting such as integrated cabinet lighting, decide which layer provides ambient light and which provides task light, so the ceiling fixture is not duplicating work the wardrobe already does.
- Confirm switching and dimming arrangements against each fixture type with the electrical contractor before first fix. This applies to every LED-integrated fitting in the package.
Step 5: Build One Order, Not Five
Once quantities and coordination are settled, consolidate. When a single one-stop furniture and building materials supplier covers the lighting, ceiling systems, wall finishes, joinery and loose furniture, you get one production window, one packing list, one shipment and one installation sequence. That matters most on overseas projects, where a late replacement fitting has to travel as its own consignment.
SANTERSON has operated since 2008 as a China-based manufacturer and supplier of furniture and building materials, with the service scope published on the site covering design, custom/OEM production, door-to-door delivery, installation and after-sales support. Lighting sits inside that same package alongside interior fixtures and building and construction materials, which is what allows the ceiling package to be ordered together with the joinery it has to coordinate against.
Pre-Order Checklist
- Room-by-room fixture schedule signed off, with each sculptural piece tied to a furniture position.
- Technical data — output, colour temperature, body dimensions, fixing detail — confirmed with the factory for the exact model, not assumed from a similar fitting.
- Reflected ceiling plan showing backing or blocking at every fixture location, with set-out dimensions against the ceiling finish grid.
- Spare quantity agreed and added to the same purchase order as the main batch.
- Switching and dimming schedule confirmed with the electrical contractor before first fix.
- Packing list grouped by room, so the installing electrician can open rooms in sequence rather than sorting cartons on site.