
Open display niches look simple on a drawing. A recess in a wall, a shelf inside it, a timber finish that matches the cabinetry next door. Then the joinery arrives on site, the reveal is out by a few millimetres, the light fitting has no driver access, and the niche sits proud of the plasterboard line. If you are sourcing built-in joinery from overseas for an Australian villa or apartment job, the detail that decides whether it fits first time is in your specification pack, not in the sample photo.
This article sets out what to verify before you place a purchase order for Santerson Open Display Niches: the site conditions, the dimension set, the finish schedule, and the coordination points that usually cause rework when wall systems are manufactured off site.
What the Santerson Open Display Niches Collection Covers
Open display niches sit inside SANTERSON's Integrated Storage Walls collection, alongside Full Height Storage Walls, Mixed Open & Closed Storage and Sliding Storage Panels. That collection context matters: a niche in this range is not a standalone accessory you bolt on afterwards. It is one module in a made-to-measure wall system, so its dimensions are locked to the carcasses, panels and trims around it.
The published product page describes project-specific sizing with material and finish options, and layout tailored to each space. That is the point of buying it this way — but it also means there is no standard catalogue size to fall back on. Everything has to be agreed in writing before production starts.
SANTERSON itself is a China-based furniture and building materials manufacturer positioned as a one-stop supplier for villa, hospitality and office projects, with custom/OEM work, logistics and door-to-door delivery listed among its services. Australian project references published on the site include villas in Sydney, Melbourne, Perth, Willoughby and North Turramurra. Those are project references rather than proof of local stock or local installation crews, which is exactly why the verification list below starts before the goods leave the factory.
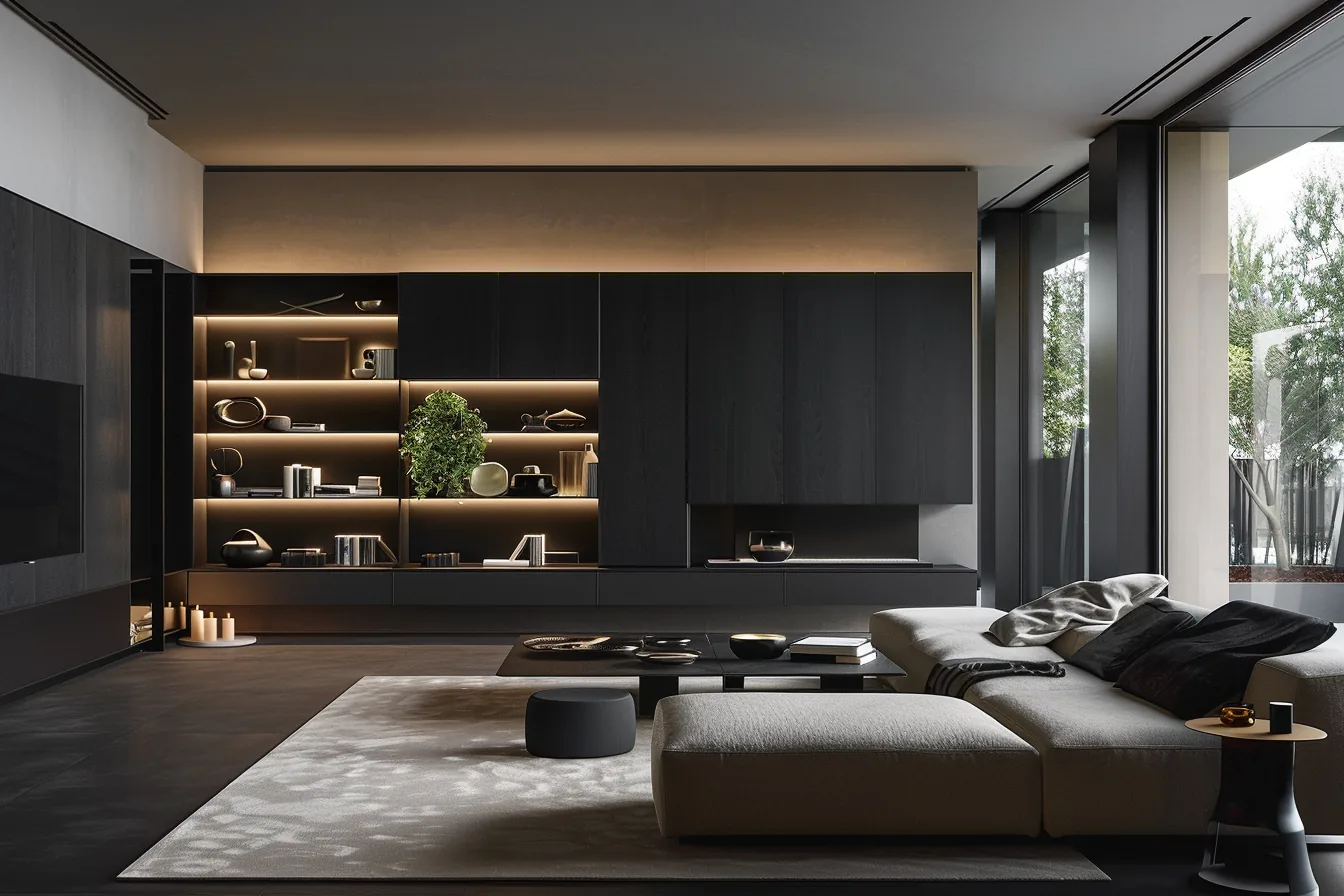
Open display niches are supplied as part of a made-to-measure integrated storage wall, so their size and finish have to match the surrounding modules.
Check the Wall Condition Before You Specify the Niche
The first question is not what the niche looks like. It is what it is being built into, and who is building that.
- Framed partition or masonry? A stud wall needs noggin/nap battens at the head and sill of the opening, sized to suit the fixing detail. A brick or concrete wall needs the recess formed, lined and squared before the joinery is measured.
- Who forms the opening? State clearly in your scope whether the local builder creates the rough opening to your joiner's setting-out drawing, or whether the niche is a surface-applied cabinet module fixed to a finished wall. These two methods produce completely different measurement records.
- Finished-floor and finished-wall lines. Give levels from a single agreed datum, not from "the slab" on one drawing and "the floor finish" on another.
- Services in the path. Switches, power points, downlights, data cabling and air-conditioning grilles that cross the niche need to be relocated or confirmed before the panel layout is fixed.
A practical rule: if your drawing set shows a niche but no dimensioned setting-out of the opening it sits in, the detail is not finished. Ask for it before you request a price.
Lock Down the Dimensions That Control Fit
"Made-to-measure" is only useful when the numbers behind it are unambiguous. For each niche, put these on one drawing and have the same drawing signed off by your builder and your supplier.
| Dimension | Why it matters on site |
|---|---|
| Rough opening width and height | Determines whether the module can be installed at all; tolerance for packing and shimming must be stated. |
| Finished face set-back (reveal depth) | Decides whether the niche reads flush, recessed or proud of the surrounding wall. Mismatch shows instantly. |
| Internal clear opening | What you actually display or store; drives shelf spans and the size of items that fit. |
| Shelf thickness, span and adjustability | Long unsupported spans sag. Fixed versus adjustable shelving changes the fixing detail and price. |
| Load intended for the shelf | Ceramics, books and stone objects are heavy; state the duty so the substrate and fixings can be specified. |
| Niche position relative to doors and returns | Prevents clashes with door swings, wardrobe fronts and curtain lines once the room is in use. |
Where a project mixes several wall modules — niches combined with closed storage or full-height walls — ask for one coordinated elevation showing every module, not separate detail sheets. Independent drawings are where the gaps between modules get missed.
Specify Finish and Substrate in Writing, Not by Reference Photo
The published product information lists material and finish options rather than a fixed specification, which is normal for this type of joinery but risky if you rely on an image from a brochure or a rendered visual.
- Name the substrate for the carcass, back panel and shelves, and confirm what each is expected to sit in — a dry internal living wall is a different ask from a bathroom niche or a laundry.
- Name the finish system and the direction of any grain, especially for veneered or wood-effect panels where a mismatched grain direction across adjacent modules is obvious once installed.
- Match the neighbours. If the niche abuts Custom Niche Paneling, wall panelling, doors or kitchen cabinetry from the same package, put all of those items on one finish schedule so the supplier can produce them in one batch with the same batch of material.
- Ask for physical samples of the actual panel and edge treatment, not just a colour chip. Edge banding and lacquer sheen are what show up most clearly under site lighting.
- Record the sheen level (matte, satin, gloss) in words on the order. Names such as "matte white" vary widely between suppliers.
If your project needs a niche that reads as part of the wall rather than as furniture added to it, this is also where Integrated Door & Paneling and concealed-door details get coordinated with the same panel schedule.
Treat Lighting as Part of the Joinery Detail
Display niches are usually lit, and lighting is where imported joinery most often gets held up on site because nobody reserved space for the driver or a way to reach it.
- Decide the light source early: concealed strip lighting in a rebate, a small fitting inside the niche, or a surface-mounted accent. Each needs a different detail.
- Confirm driver location and access. A driver sealed behind a fixed panel becomes a maintenance problem for whoever has to replace it years later.
- State colour temperature and output on the drawing, and check it against the room's other lighting so display niches do not read as a different colour of white.
- Coordinate electrical rough-in with your local electrician's set-out before wall closure. Confirm the supply requirements for whatever is specified — Integrated Cabinet Lighting and related accessories are configurable items, and their electrical specification should be checked against your cabinet design rather than assumed.
- Confirm who supplies and who installs the lighting, and whether it ships loose or pre-fitted to the panel.
Have your electrician confirm the local installation requirements for any low-voltage or line-voltage fitting in the finished installation. Product documentation from an overseas manufacturer does not tell you what your electrical contractor needs to sign off.
Verify Compliance and Certification Questions Yourself
This is the part a supplier cannot decide for you, and it is where an inexperienced buyer gets caught out.
- Building-code and fire questions for wall linings and any required bulk material properties should be answered by your certifying engineer, building surveyor or architect based on the actual product data sheet — not by a marketing page. Ask the supplier for written technical data on the specific board and finish you are buying.
- Electrical components must be accepted by your electrical contractor for installation in your state or territory. Ask for the fitting's technical documentation before ordering.
- Warranty terms, coverage and exclusions should be read as a document, not inferred from service pages that mention inspection, snag lists, spare parts and maintenance.
- Certification claims on a website are marketing statements. If a certificate matters to your contract, ask for the certificate itself and check its scope and validity date.
Sourcing from overseas does not move responsibility for compliance off the Australian side of the transaction. Budget time in your programme for this verification rather than treating it as paperwork at the end.
Settle the Commercial Terms Before Production Starts
Custom joinery cannot be returned or resold, so the commercial terms decide how an error gets resolved.
- Incoterms and what they include. Confirm whether the quoted price covers freight, insurance, customs clearance and delivery to site, or only to port. Door-to-door service is offered as part of the supplier's logistics scope, but the exact terms — duties, who acts as importer of record, delivery address, lift and truck access — need to be in your order.
- Packaging and crate labelling. Ask for crates marked with the room and elevation reference that matches your drawings. A site crew that cannot identify which panel belongs to which wall will force-cut it.
- Container loading plan and sequence, so the joinery arrives in the order your programme needs it.
- Measurement responsibility. Agree in writing who is liable if on-site dimensions differ from the setting-out drawing. This single clause is the difference between a two-week fix and a dispute.
- Spare panels and extra material from the same production batch — a matching panel ordered a year later can differ in colour and grain.
- Payment milestones tied to approved shop drawings, not just to a deposit and balance on shipment.
Sequence Shop Drawings, Samples and Sign-Off
SANTERSON's published service workflow runs from consultation and design through production, logistics, installation and after-sales, with custom/OEM work supported by prototyping and material selection. On a niche package, that workflow should be compressed into four gates you control:
- Gate 1 — Setting-out. Builder-approved opening dimensions and levels, taken on site after linings are up, not from the architectural drawing alone.
- Gate 2 — Shop drawings. Coordinated elevations of every wall module with dimensions, reveal depths, shelf details and lighting positions. Signed by you and the builder.
- Gate 3 — Samples. Panel, edge and finish samples physically approved before production release.
- Gate 4 — Delivery and inspection. Check quantities and crate references on arrival, inspect for transit damage while packaging is still available for a claim, then store panels flat and dry in the trade sequence you need them.
Installation and snagging support are listed among the supplier's services. Confirm what is actually available for your project location and how it is arranged before you assume an installer will be on site — otherwise plan for your own joiner to install from the shop drawings, which is the more common arrangement.
A Pre-Order Checklist for Australian Buyers
- Opening dimensions and levels taken on site, signed by the builder
- One coordinated elevation covering all wall modules in the run
- Named substrate, finish system, edge treatment and sheen level
- Physical samples approved before production release
- Shelf duty, span and adjustability stated
- Lighting type, colour temperature, driver location and access detail resolved
- Written technical data sheets for board, finish and light fittings
- Incoterms, duties, importer of record and delivery address confirmed in the order
- Crate labelling matched to drawing references
- Warranty document read, not assumed
- Measurement-liability clause agreed
- Spare panels ordered with the same batch
Work through this list before you release a deposit. Every item on it is cheaper to resolve on paper than after the container has been booked.
Related Products Worth Reviewing in the Same Package
Niche detailing rarely stands alone. Buyers specifying display recesses usually need to settle these items on the same schedule:
- Santerson Open Display Units — open display for living projects where a fully recessed niche is not appropriate
- Santerson Illuminated Display Cabinet — lit display with its own lighting and electrical specification to confirm
- Niche Shelving — shelving detail for bathroom-type niches, also made to measure
- Santerson Shelving Accessories — internal accessories sized to the carcass
- Santerson Storage & Display Combo — where display niches share a wall with media and closed storage
Ordering these as one package on one finish schedule avoids the dimension and colour mismatches that appear when wall modules are bought separately. As a custom furniture and interior products manufacturer, SANTERSON also lists bespoke finishes, material selection and prototyping under its Custom & OEM service — the route to use when a niche has to match an existing joinery profile on site.
The single most effective thing an Australian buyer can do before committing money: send your own dimensioned setting-out drawing, ask for shop drawings back, and refuse to release production until those drawings and physical samples are signed. Everything else in this list is supporting detail.
Send the room elevations, opening dimensions and finish references for your wall package, and specify the niche layout, lighting position and material options at the same time so the whole run is produced in one batch.
Contact SANTERSON about custom wall systemsProduct configuration, dimensions, finishes and technical performance vary by project. Confirm all specifications, written technical data and your own compliance obligations with the supplier and your local building and electrical professionals before ordering.