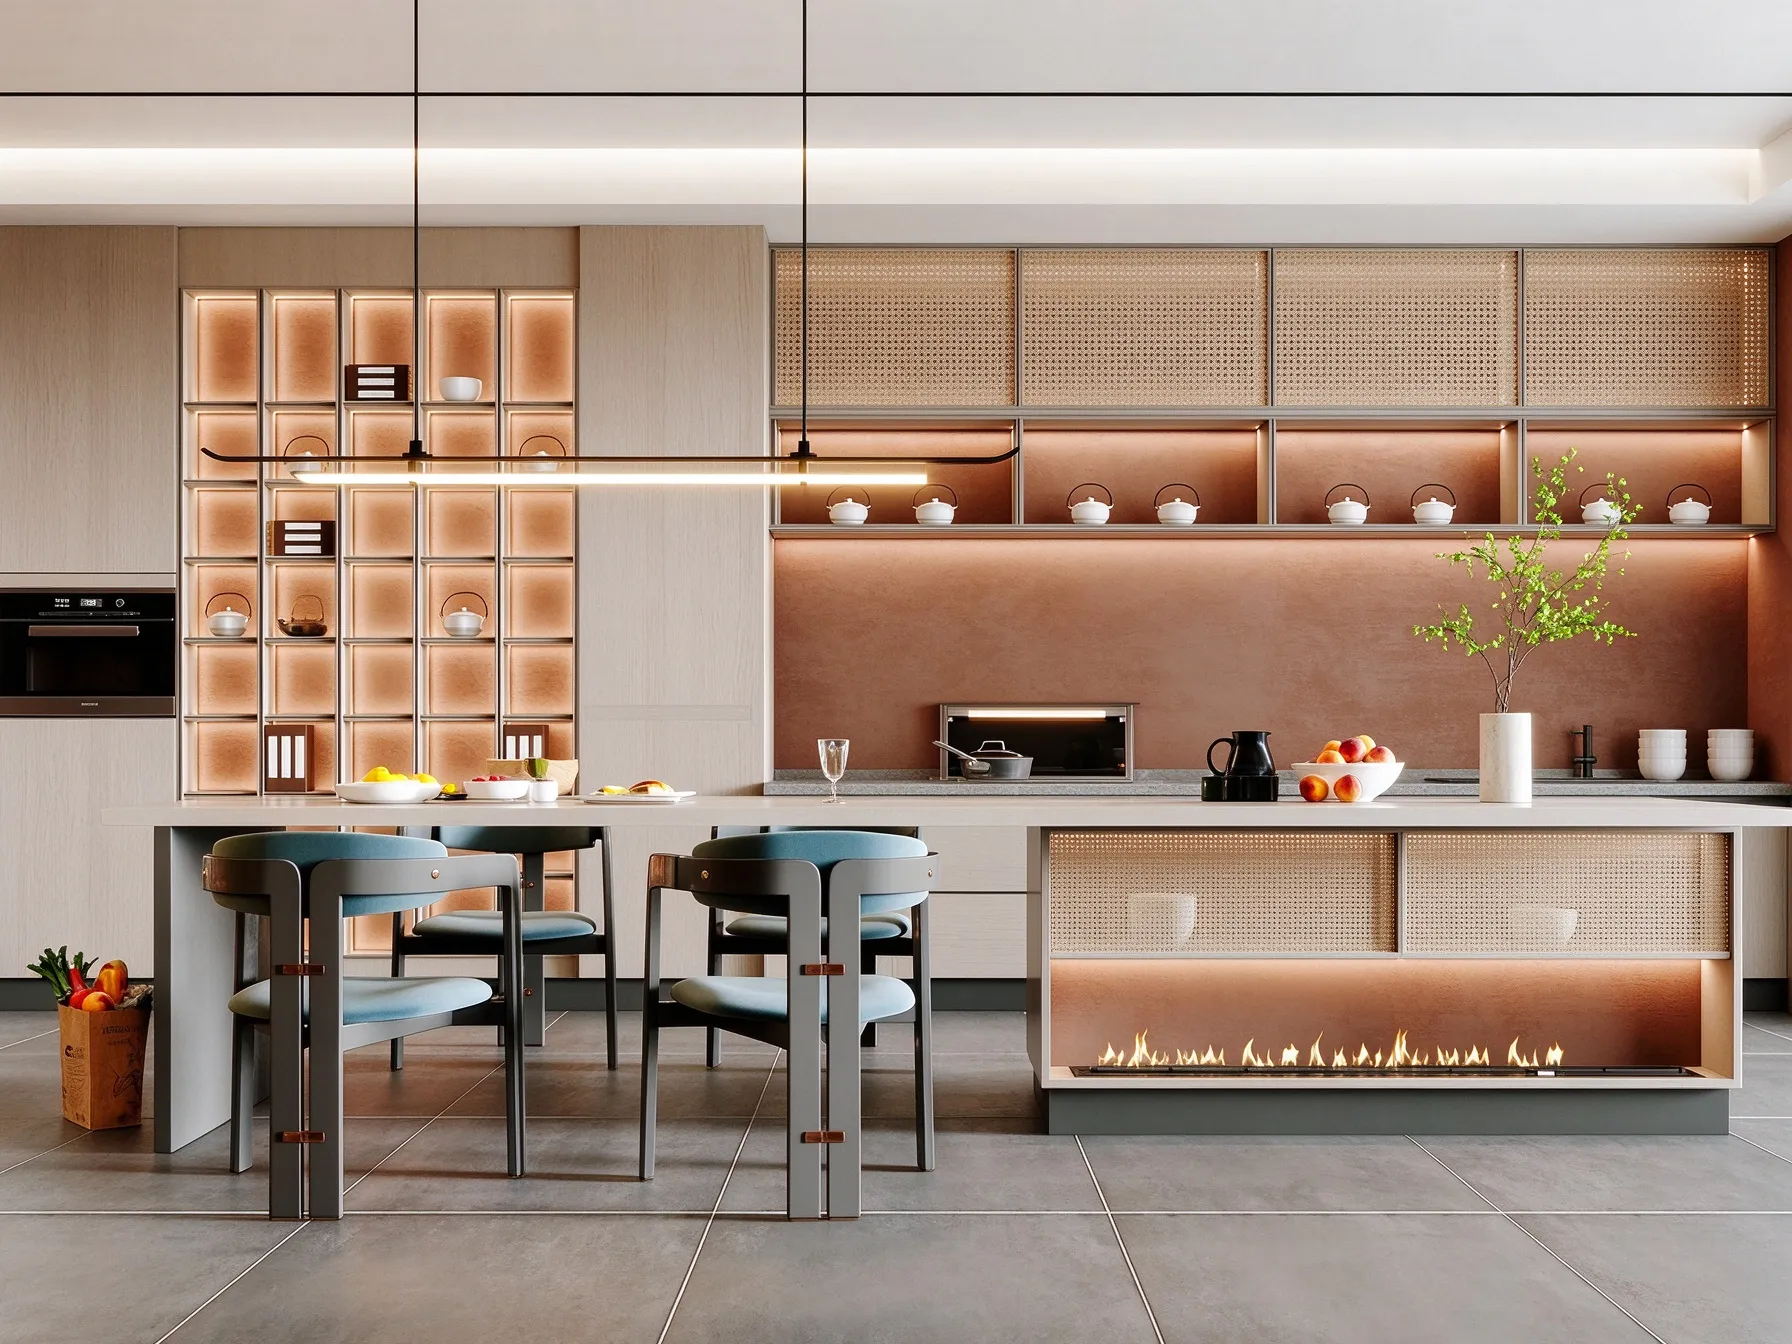
A set of Wabi Sabi Rattan Kitchen Cabinets with Island looks effortless on paper: natural wood tones, woven rattan panels, an island that runs into the dining table, warm LED light inside open shelving. That is exactly why it goes wrong so often on site. Cabinetry this customised arrives in multiple crates, carries glass and woven fronts, and has to meet stone, appliances and services that other trades control. If delivery and installation are treated as an afterthought, the cabinets sit in a corridor for six weeks while the kitchen stays unusable.
The sequence below is how we plan the last part of the job for villa, boutique hotel and high-end apartment projects — from the moment the cabinet drawings are signed off to handover. It follows the workflow SANTERSON runs as a one-stop furniture and building materials supplier: design coordination, production, logistics, installation and after-sales.
Why rattan-and-island kitchens need a delivery plan of their own
Standard flat-pack cabinetry is forgiving. A wabi-sabi scheme is not, for four practical reasons that shape every downstream decision:
- Natural materials move. The cabinets combine a solid wood frame with woven rattan panels in a natural wood tone. Timber and weave respond to humidity swings, so the panels should reach the site already acclimatised to the space they will live in, not stored in a damp garage or left in a sealed crate through a hot week.
- The island is a joined element. The integrated kitchen island extends into a dining table, so the run and the island are dimensionally dependent on each other. If one crate lands late, half the room is dead wood.
- Appliance positions are fixed in the carcass. The cabinets reserve positions for built-in ovens. That means oven, hob and refrigerator models have to be confirmed before production, not at installation, because the housings and ventilation gaps are cut to those units.
- Recessed lighting is built into the joinery. Warm LED strips sit inside open shelving to highlight tableware. They need a driver location, a switch point and a feed that the electrician has already run — otherwise the joiner arrives with nothing to connect to.
Step 1: Lock the specification before production starts
Custom work is where delivery problems are created or avoided. These cabinets are made to order — cabinet dimensions, internal storage partitions, wood colour and surface treatment are all specified per project — so a late change does not cost a phone call, it costs a re-made module.
- Confirm room dimensions against a site survey, not the architectural drawing alone. Note floor level differences, skirting, door swings, columns and any pipework proud of the wall.
- Fix the appliance schedule: oven models and their ventilation requirements, hob type, sink bowl, tap, dishwasher.
- Fix the worktop material and edge detail, since the top sets finished heights for the island dining surface.
- Confirm wood colour and surface treatment on a physical sample, viewed in the room's own light. Wabi-sabi finishes rely on low-sheen, natural-looking surfaces that read differently under warm LED than under showroom lighting.
- Agree the internal layout room by room — drawer-focused sections, tall larder housings, corner access — so no one improvises on site.
Our custom and OEM service covers this stage: bespoke finishes and textures, prototyping where a project needs one, and flexible minimum order quantities for villa work that does not come in container volumes.
Step 2: Build the delivery schedule backwards from site readiness
The most common failure is a shipment that arrives before the room is ready, or after the trades have moved on. Work backwards from the date the kitchen must be finished:
| Milestone | What has to be true at that point |
|---|---|
| Site survey and drawing sign-off | Room dimensions verified; appliance schedule and worktop material fixed; storage layout agreed. |
| Production release | Cabinet dimensions, wood colour and surface treatment confirmed against a physical sample. |
| First article check | A representative carcass, a rattan-front door and an island section reviewed before the full run ships; LED driver position and appliance housings verified. |
| Book the freight window | Crate list and volumes known, so the cabinetry can be consolidated with the rest of the fit-out rather than shipped as an awkward one-off consignment. |
| Site readiness date | Flooring laid and protected, wall and ceiling finishes complete, electrical feeds and drivers in place, plumbing rough-in tested, room enclosed and dry. |
| Delivery slot | Crate route from dock to kitchen measured — door widths, lift or stair dimensions, turning spaces, lift booking times in an apartment block. |
| Installation crew booked | Joiner on site for the full run; electrician available for the same window to connect lighting and appliances. |
| Snag list and handover | Doors aligned, drawers running true, worktop joints sealed, all LED sections switching correctly, spares handed over. |
The gap that protects the programme is between production release and site readiness. If the room will not be dry and enclosed when the crates land, hold the shipment at the port or in bonded storage rather than park it on site — rattan panels and unfinished timber edges are the first things damaged in a busy building.
Step 3: Consolidate the cabinets with the rest of the fit-out
A kitchen rarely ships alone. In villa and boutique hotel projects the same package usually includes wardrobes, vanities, doors and panelling, plus flooring and wall finishes. Handling that as one programme rather than six separate orders is what keeps delivery dates honest.
- Flooring first, cabinets second. Engineered wood flooring should be laid and protected before the carcasses go in, so the run sits on a finished level surface instead of being trimmed around it later.
- Walls and ceilings set the reveal. Decorative wall finishes and wall panels need to be complete at the cabinet line, including any niche or open-display detail that the joinery butts into.
- Lighting is a shared decision. Cabinet-integrated lighting and room fixtures should come from one schedule, so driver positions, switching and colour temperature are consistent across the kitchen and the adjoining dining area.
- Bathrooms run on the same clock. Where the project also covers vanities and sanitary ware, those items are coordinated into the same container plan and the same trade sequence, which removes a second mobilisation.
As a logistics and door-to-door delivery service we handle freight by sea, air and rail, packaging and container loading, customs paperwork and shipment tracking — so the cabinetry, flooring, lighting and joinery for one project move as a single consignment with one tracking line.
Step 4: Pack and label for the installer, not the warehouse
Cabinetry that arrives labelled by crate number rather than by room is slow to install and easy to lose. The labelling we ask for on a project like this:
- Crates marked with zone, elevation and module code matching the shop drawing, so a carcass can be placed without unloading everything.
- Rattan-front doors and glass elements packed vertically with edge protection, separated from heavy carcass crates.
- Worktop blanks and island top panels flat, on dunnage, off the ground.
- LED strips, drivers and trims in a clearly marked small-parts box, with a spare quantity included rather than zero tolerance.
- Hinges, runners, handles and adjustable feet bagged per module, with fixings suited to the actual wall build on site.
- Packing list that mirrors the drawing schedule, so the site team can tick modules off as they are placed.
Step 5: Install in a fixed order and record the snags
For this type of kitchen the practical order is:
- Check the room: levels, square, floor flatness, feed positions against the drawing. Any deviation gets resolved before a single carcass is opened.
- Set and level the tall housings and run, checking for plumb along the whole elevation, since appliance housings cannot be trimmed later without re-cutting.
- Install the island and its dining extension as one unit, then set the worktop to it.
- Fine-tune door alignment on the rattan fronts with the finished wall finish in place — woven panels show misalignment far more than a flat lacquer front does.
- Connect integrated LED lighting, test every section on its switching circuit, then fit diffusers and trims.
- Fit appliances into their reserved positions, confirm ventilation gaps, run the oven and dishwasher through a cycle.
- Walk the snag list with the client or contractor, photograph what is closed out, and hand over spares plus the finish reference used.
Our installation and after-sales support covers on-site installation, inspection and snags, warranty coverage, spare parts and ongoing maintenance. Response times and warranty terms are set out per project in writing rather than assumed — for Australian villa work we confirm installer arrangements and site access with the local contractor before the crew is booked.
Common causes of delay, and what to do about them
| Appliance models confirmed late | Oven housings and ventilation gaps are re-cut on site. Fix the appliance schedule at drawing sign-off; if a model changes, stop production before the carcass is machined. |
| Room not dry or enclosed | Timber and rattan panels absorb moisture and get knocked by other trades. Hold the shipment until the room is sealed, painted and swept. |
| Crate route not measured | A full crate will not pass a narrow apartment doorway or lift. Measure the route from vehicle to kitchen before booking the delivery slot. |
| Electrical feed missing at shelf line | Integrated lighting cannot be connected, and chasing a finished wall later damages the joinery. Confirm driver position and switch point on the drawing, then check it on site. |
| Wood colour approved from a screen image | The installed tone reads differently in the room than on a phone. Approve a physical sample under the room's own lighting before release. |
| Cabinets ordered as a standalone purchase | Flooring, wall finishes and lighting arrive on their own schedule and the kitchen sits half-finished. Put the whole fit-out in one procurement programme. |
How project experience changes the plan
Private villa renovation
One kitchen, one client decision-maker. The critical path is approvals: sample sign-off and the appliance schedule. Deliver once, install in a single crew visit, and keep the site clean enough that the family can use the rest of the house while the work runs.
Boutique hotel or serviced apartment
Repeated units, but with the same joinery detail. A first-article unit is installed and signed off before the remaining sets ship, so any adjustment to rattan panel tolerances or LED driver positions is resolved once instead of across every floor. Installation then runs in batches aligned with room-release dates.
High-end apartment
Building access rules dominate: lift booking windows, protection to common areas, working hours. Crate sizes are planned around the lift car, and deliveries are scheduled into permitted slots rather than on arrival of the container.
A short checklist before you release production
- Site survey signed, with floor levels and feed positions recorded.
- Appliance models fixed, including ventilation requirements.
- Worktop material, thickness and edge detail fixed.
- Physical wood-colour and surface sample approved in the room.
- Internal storage layout agreed per module.
- Crate route measured from vehicle to kitchen.
- Site readiness date confirmed in writing by the contractor.
- Freight mode, customs paperwork and delivery slot booked against that date.
- Installation crew and electrician booked in the same window.